Test
50 Items
50 Items


All about extensions
All about extensions
Ultra Tape Extensions
Ultra Tape Extensions
Next generation DIY tape-ins.
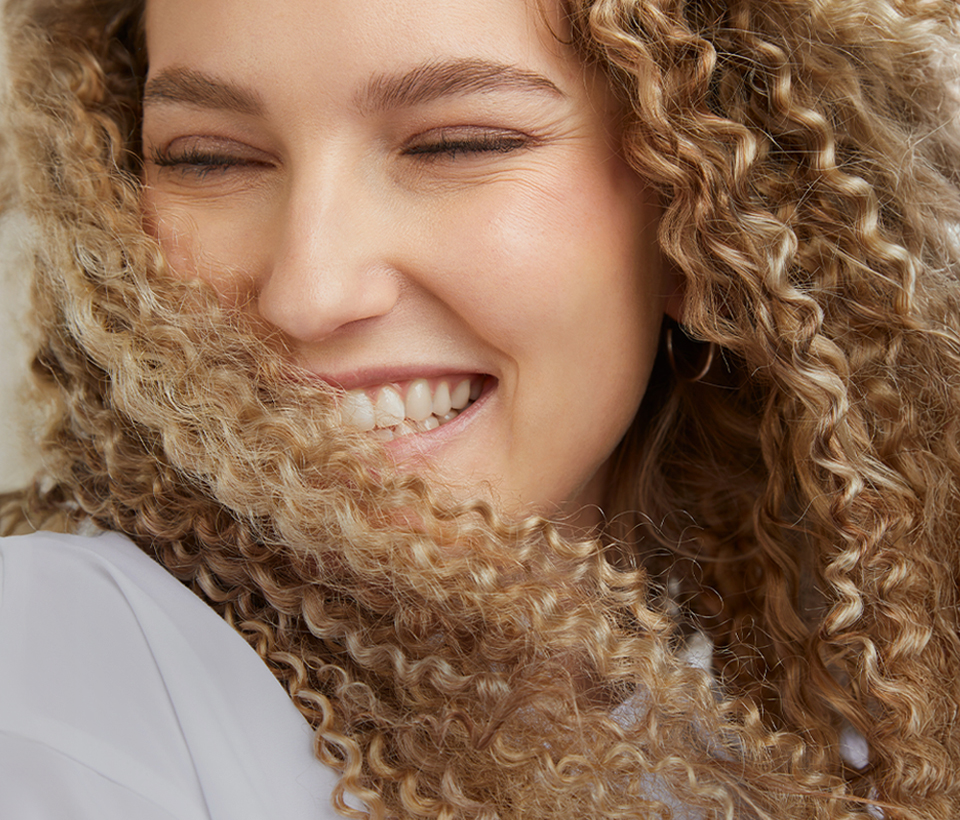
Bring on hair so stunning, it’s cover girl material.
What is the difference between Classic, Invisible, and Vegan?
In Rapunzel of Sweden's Clip-ins range, you will find three variants: Classic, Invisible, and Vegan. Both Classic Clip-ins and Invisible Clip-ins are made of full, real hair. Vegan Clip-ins are made of very natural-looking hair made from synthetic fibers. In addition to the hair itself, the difference between the variants lies in the weft (the upper edge of the hair pieces). We explain more below.
Invisible Clip-ins have a weft made of transparent polyurethane (PU) on each hair piece. The weft is very thin and flexible, lying flat against the head. Invisible Clip-ins create a temporary hair extension or thickening without bumps, perfect for those with thin to medium-thick hair.
Vegan Clip-ins, like Classic Clip-ins, have a sewn weft on each hair piece. The weft seam is soft and flexible and rests comfortably against the head. Classic Clip-ins are suitable for those with medium to thick hair who want a temporary hair extension or thickening.
Styling the Clip-ins
Styling your Clip-ins is very important as it helps the hair extensions blend more seamlessly with your own hair. When curling, straightening, or blow-drying your hair, always use heat protection to safeguard both your own hair and your Clip-ins. You should not expose the hair to temperatures higher than 180°C.
Your Clip-ins can be styled either before or after insertion. For optimal results, you should wash your hair extensions before styling them for the first time.
You can also choose to use only a few pieces of your Clip-ins when you want to add extra volume to your hairstyle.


Storing the Clip-ins
Brush through your dry Clip-ins and store it in a dark, dry place, preferably in a closed box or hair bag. If you store your hair in a box, it’s a good idea to braid or gently twist it so that it doesn’t get tangled.
Which clip-ins should I choose?
Our Clip-ins come in three different volumes: Light Volume, Medium Volume and Max Volume. What you should choose depends on the result you want to achieve.

Light Volume is suitable for those who want to add volume to their own hair. The three hair pieces provide natural fullness. Do you want light or dark highlights in your hair? Then choose Clip-ins Light Volume in a shade lighter or darker than your own hair to create color effects.

Medium Volume is for those who want to create a full hair extension. Medium Volume consists of 7 or 5 hair pieces in different sizes, designed to add length and volume around the entire crown. Cut and style the extensions together with your own hair for a natural result.

Medium Volume and Light Volume can be combined. Mix both sets for a full hair extension with maximum volume. Choose Medium Volume and Light Volume in different colors if you want to create color effects.

Max Volume is for those who want a temporary hair extension with maximum volume. Max Volume consists of 250g of hair distributed across 6 pieces. The large amount of hair creates an unbeatable, full hairstyle that can be styled as desired.

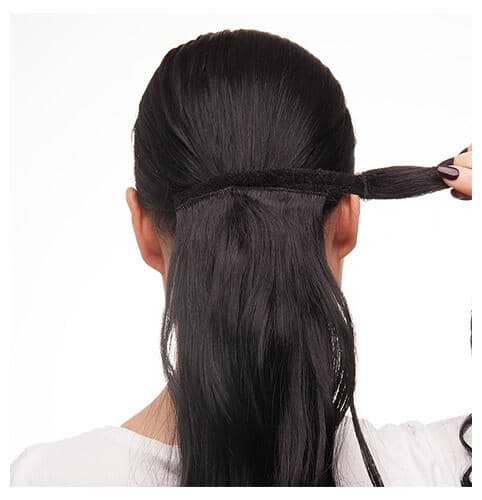


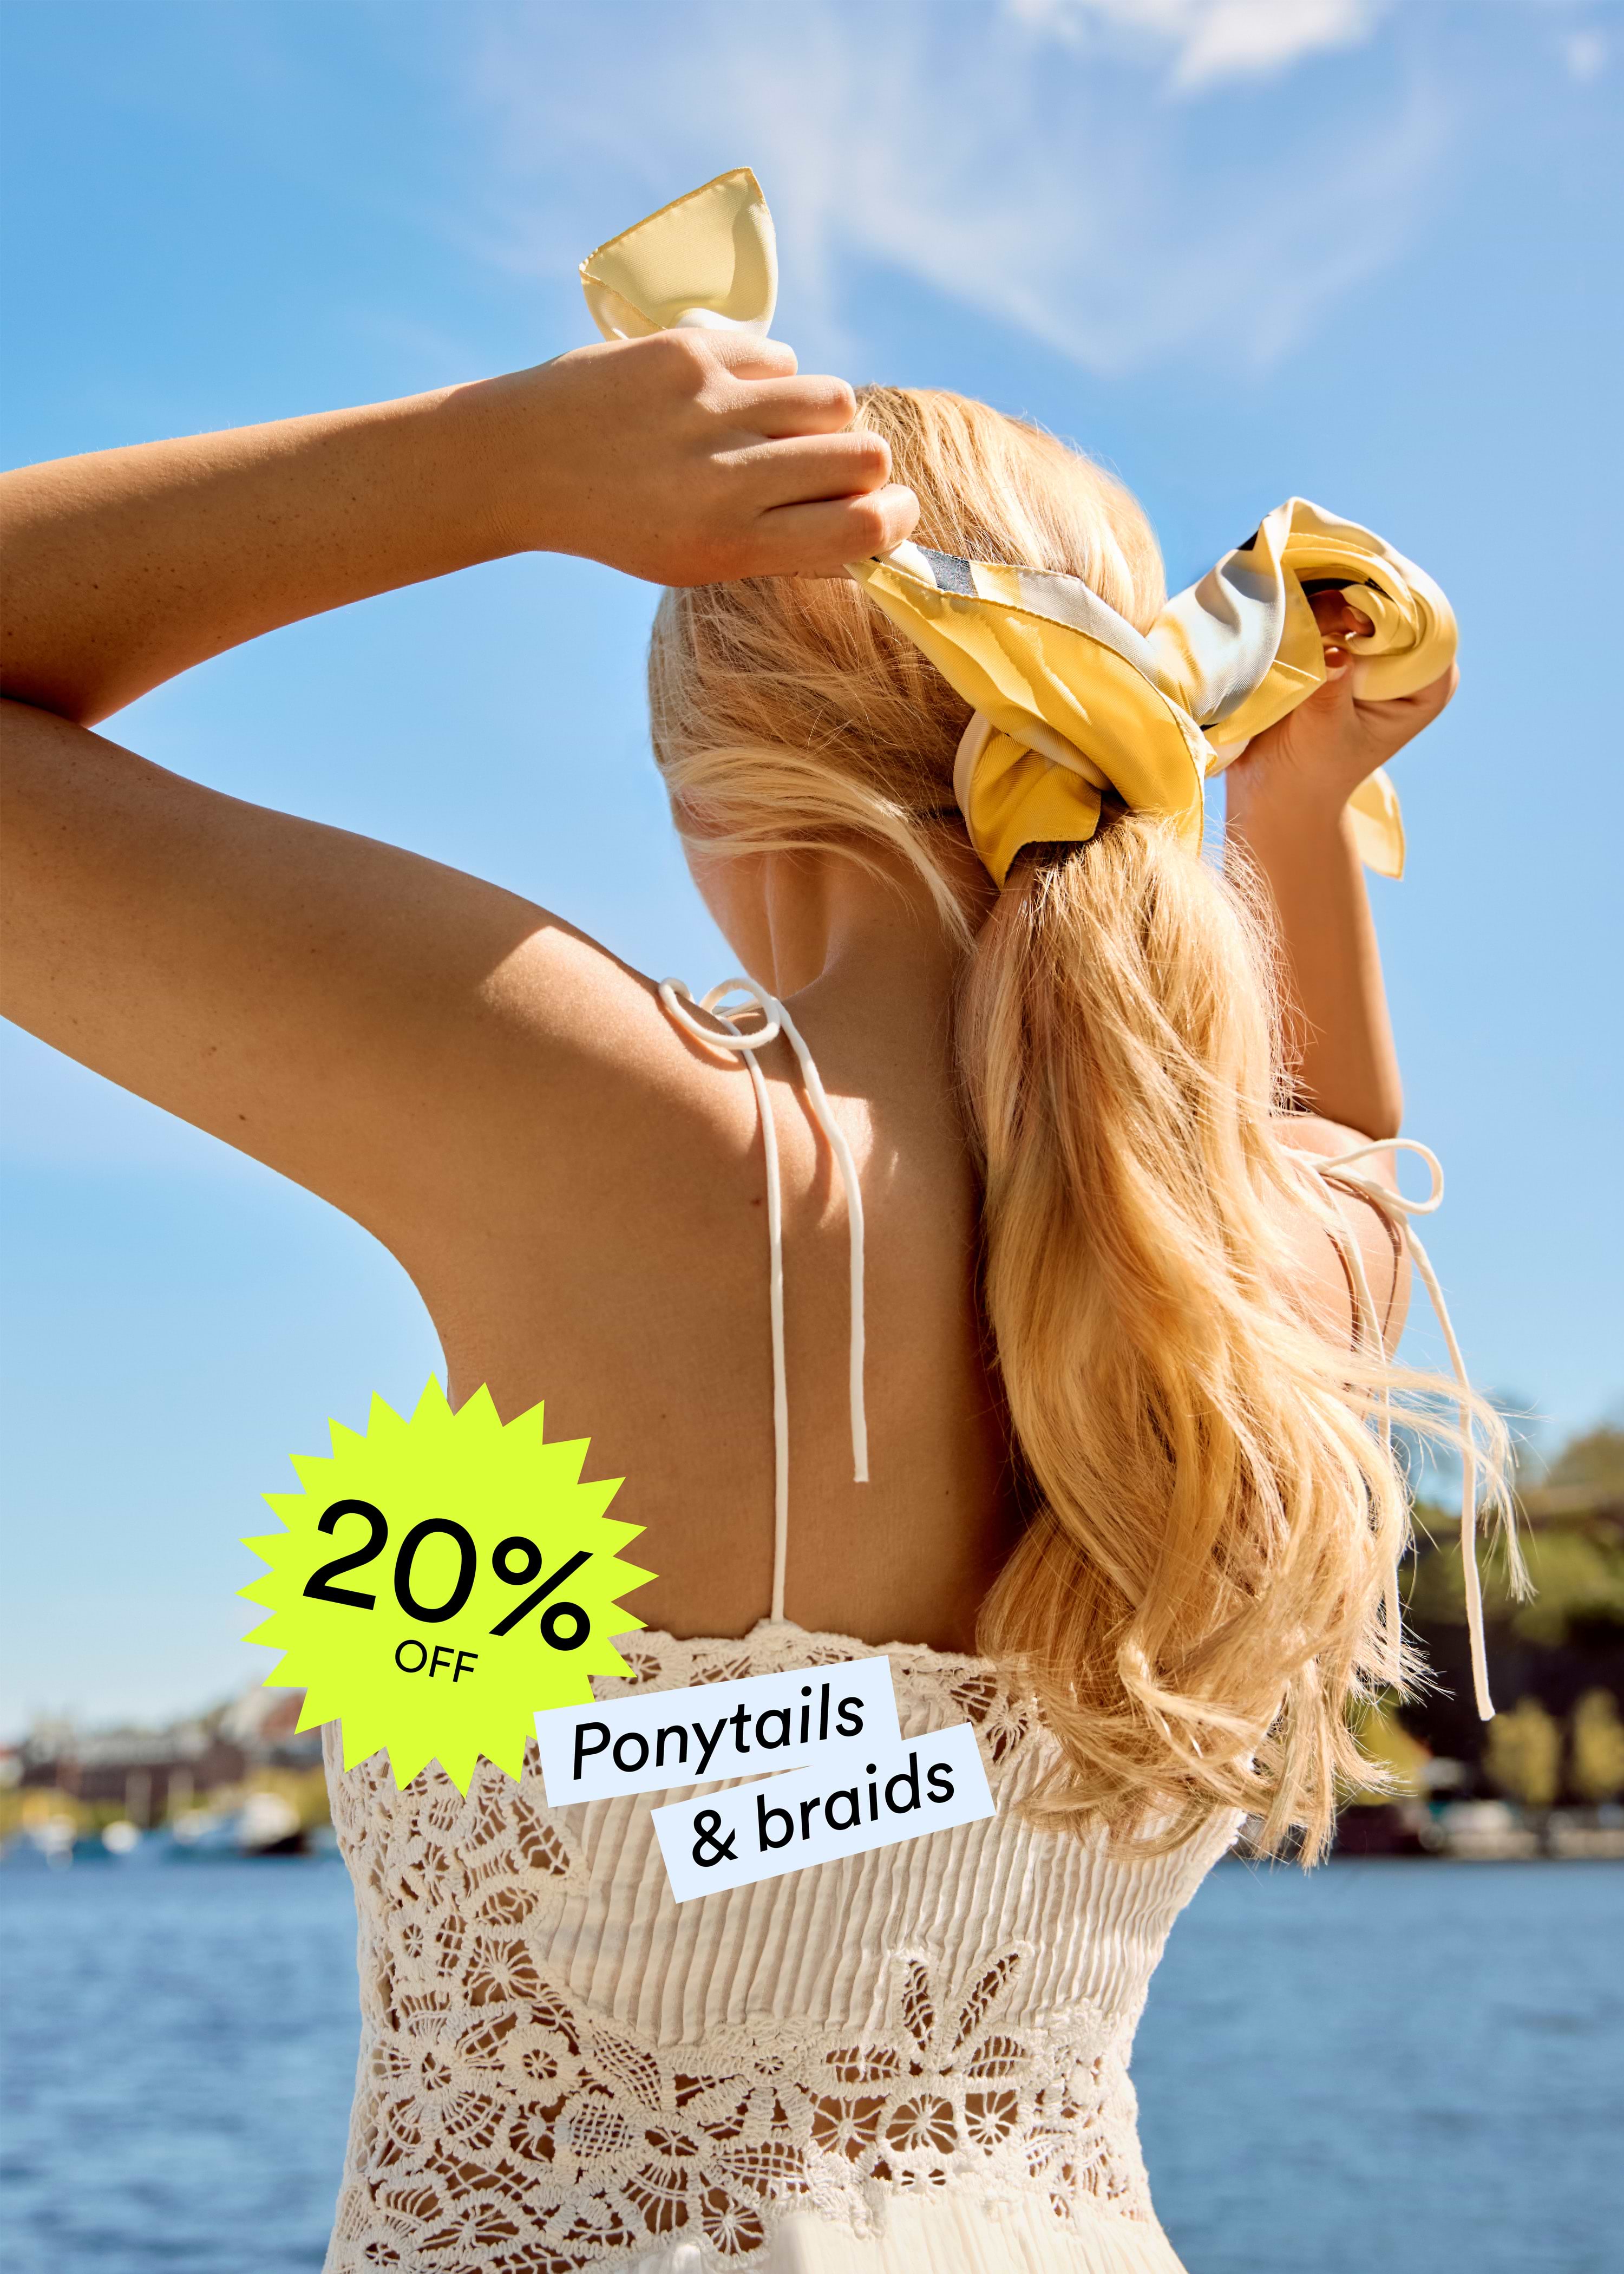
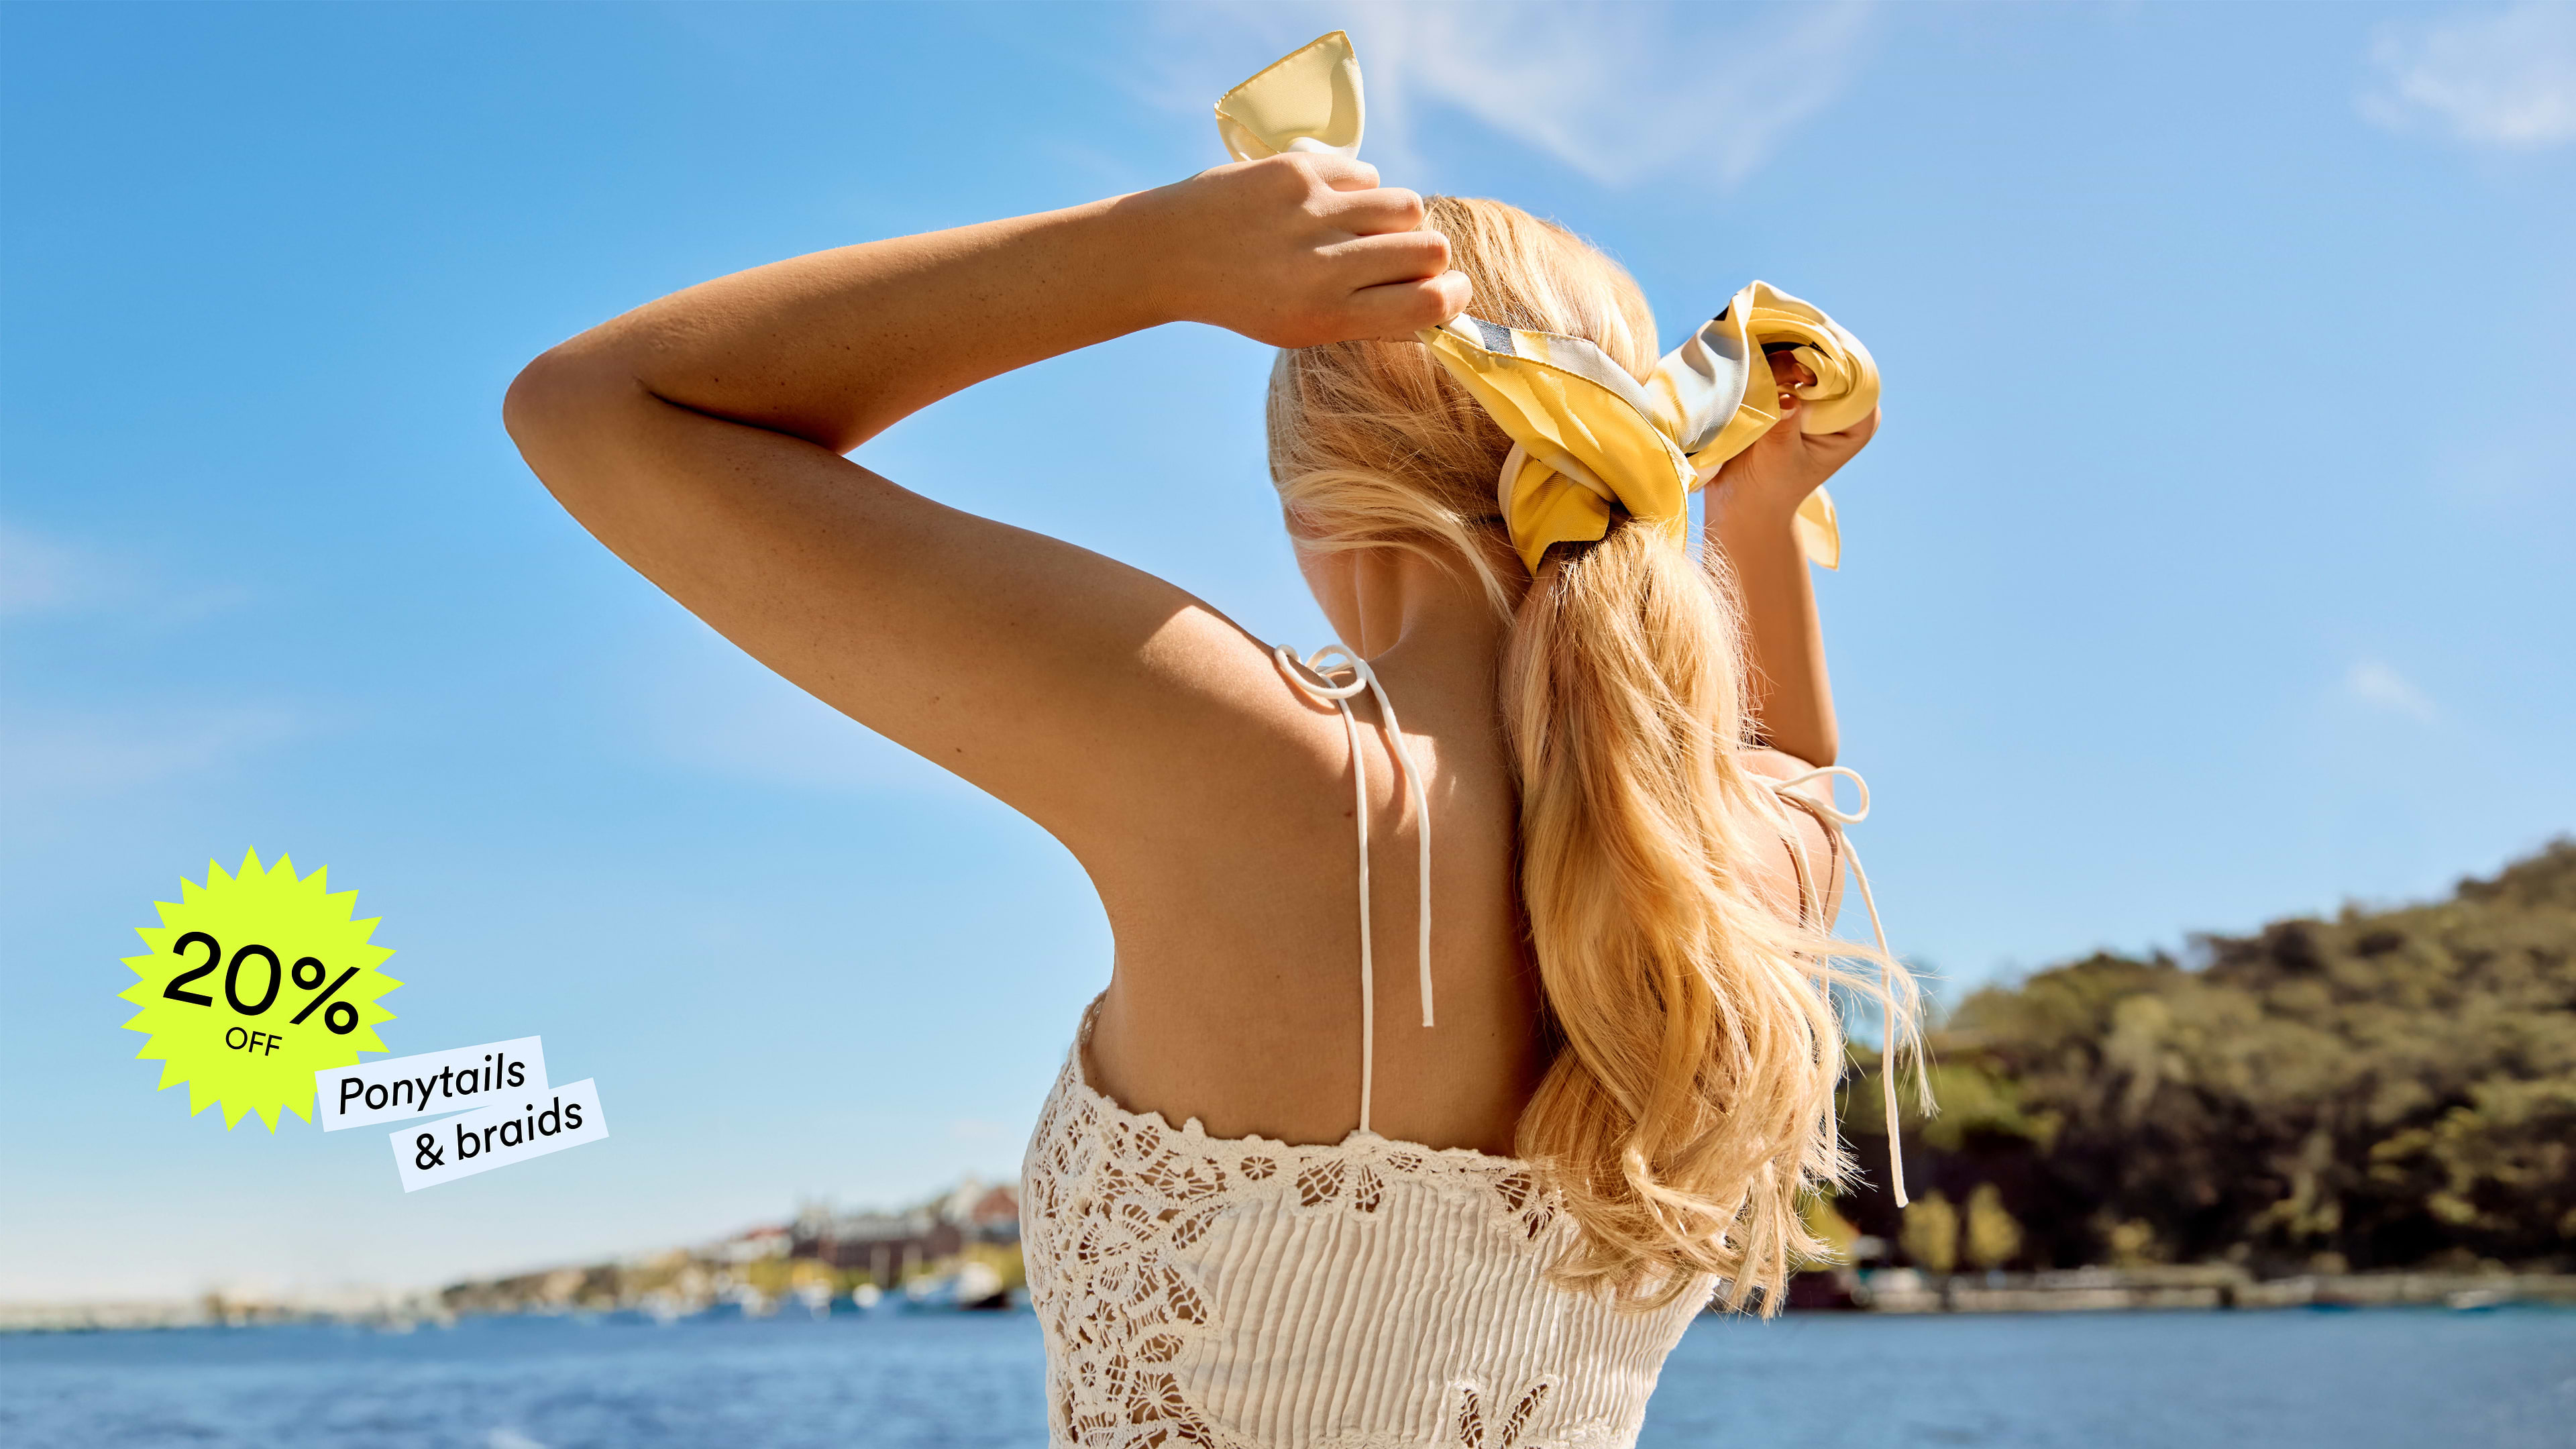
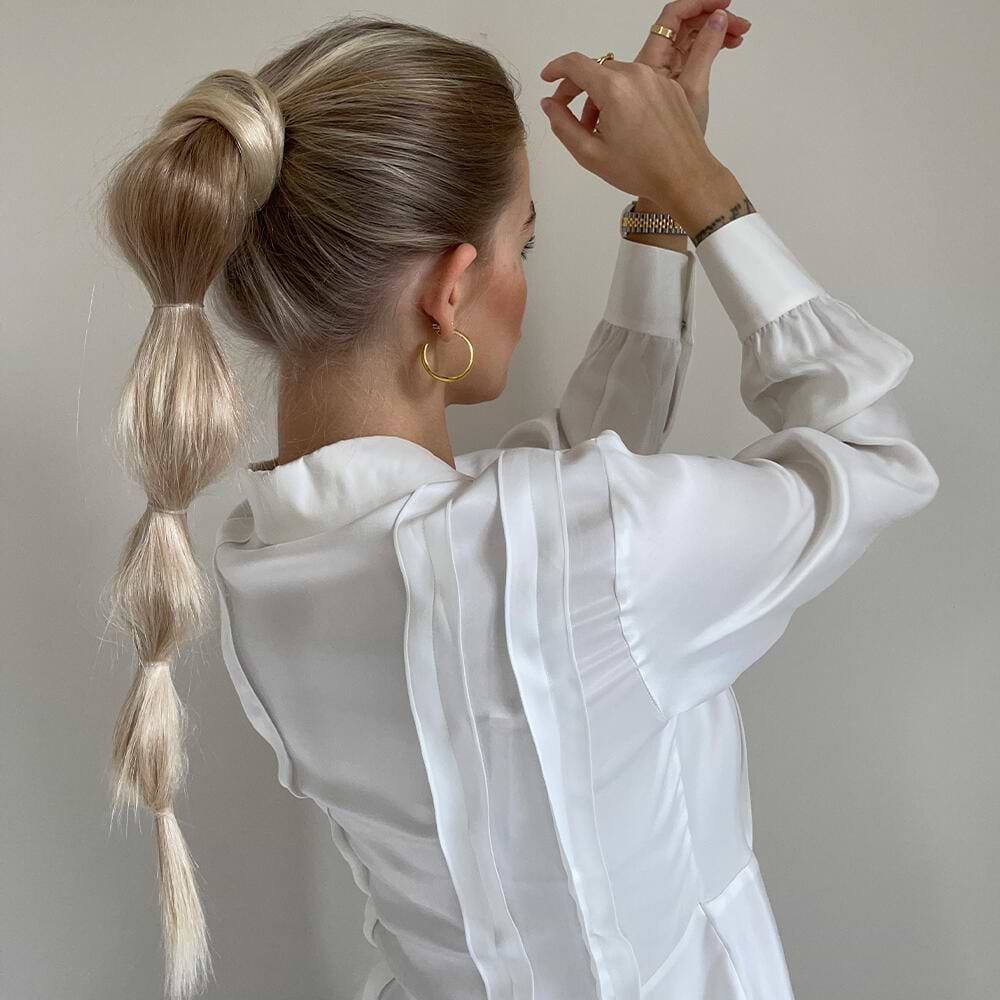
Medium Volume or Light Volume?
Rapunzel offers two different ponytails made of real hair. Our Medium Volume Ponytail and our Light Volume Ponytail.

If you want the ultimate wow effect with a long, voluminous ponytail, Medium Volume Ponytail is ideal. Available in four lengths (30, 40, 50 and 60 cm), this ponytail has a thicker attachment point with 50–100 g of hair, making it particularly suitable for those with medium to thick hair. The amount of hair on Medium Volume Ponytail can make it feel heavier for those with thinner, finer hair.

Light Volume Ponytail is recommended for those who seek a stylish look with a longer and slightly thicker ponytail that weighs less. This ponytail is available in two lengths (40 and 50 cm) and has a thinner attachment point with 45–55 g of hair. As Light Volume Ponytail is more lightweight with a thinner attachment point, it is suitable for those with finer, thinner hair, common in Scandinavia.
Styling your Ponytail
Your ponytail can be trimmed and styled by your hairdresser to get the desired length. You can choose to style your ponytail before or after insertion. The Ponytail in real hair can be styled with heat up to 180°C. The Vegan Ponytail made of synthetic hair can be styled with heat up to 150°C. Remember to always put on heat protection when using styling tools. Store the product in a dark, dry place, preferably in a box.

Washing your Ponytail
Washing your Ponytail
Your new, real hair product thrives on love and care. Follow these instructions so that your ponytail looks its best for as long as possible. The less often you wash and style your extensions, the longer they last.
This is how:
1. Before washing your ponytail, brush through it to ensure that it’s free of tangles. Using a soft hairbrush, start by brushing the ends and work your way up in sections.
2. Rinse the hair in lukewarm water, and wash twice with Rapunzel’s recommended shampoo. Avoid rubbing the hair. Rinse.
3. Use a deep conditioning treatment regularly. Leave it on for at least 10 minutes, preferably longer. Rinse and finish with conditioner.
4. Let the hair dry naturally on a towel. Then finally, hang the hair to dry until it’s completely dry.
A ponytail made of synthetic hair also needs to be cared for. Like real hair, a Vegan Ponytail lasts longer the fewer times you wash and style it.
This is how:
1. Detangle the hair with the Extension Brush before washing. Start with the ends and work your way up.
2. Rinse the hair with lukewarm water and then apply shampoo from root to tip. Avoiding rubbing. Rinse thoroughly and repeat with shampoo a second time.
3. Apply conditioner to the lengths and rinse thoroughly.
4. Allow the hair to dry naturally, preferably on a Hair Hanger.
5. Detangle the hair when dry.
Get inspired


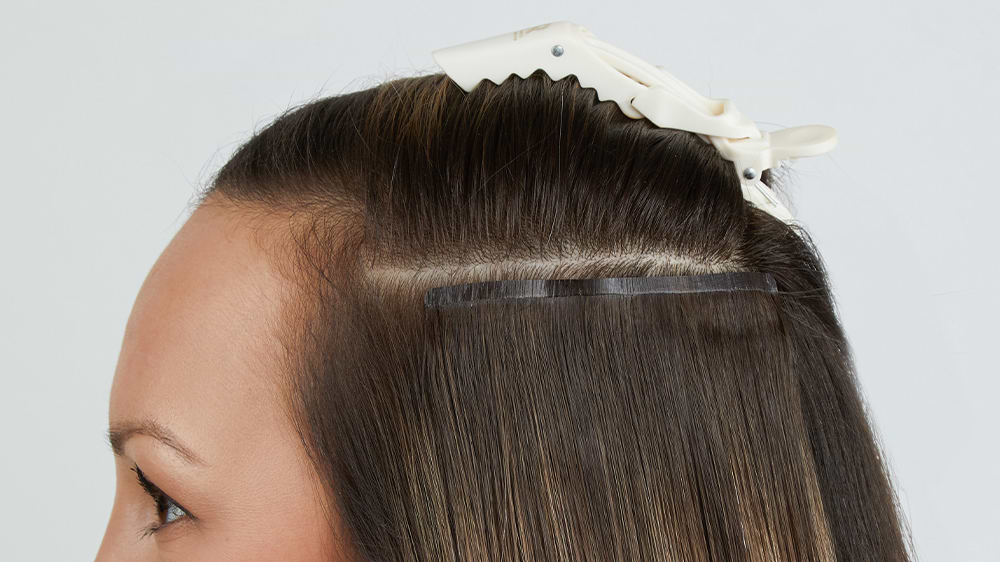
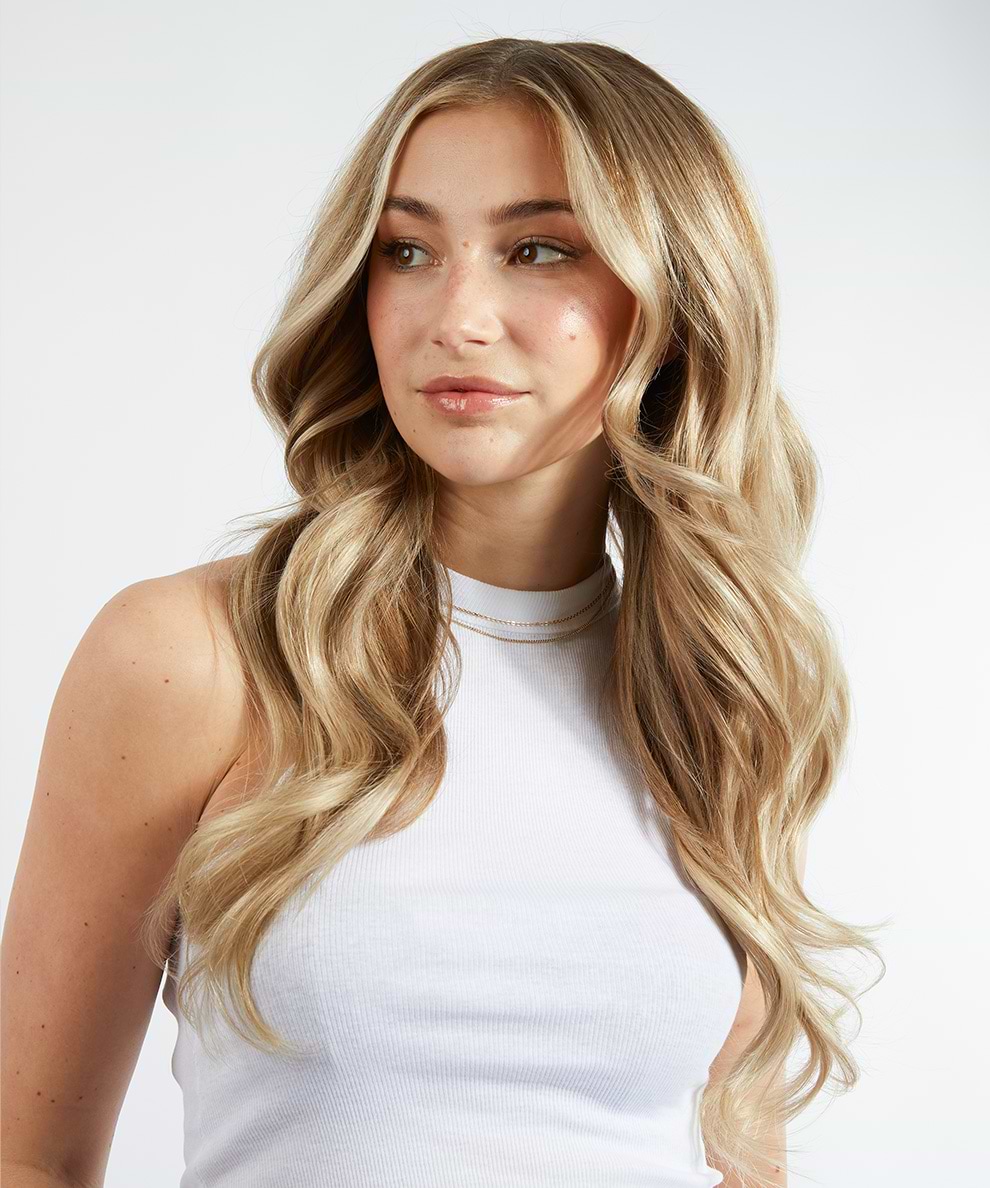
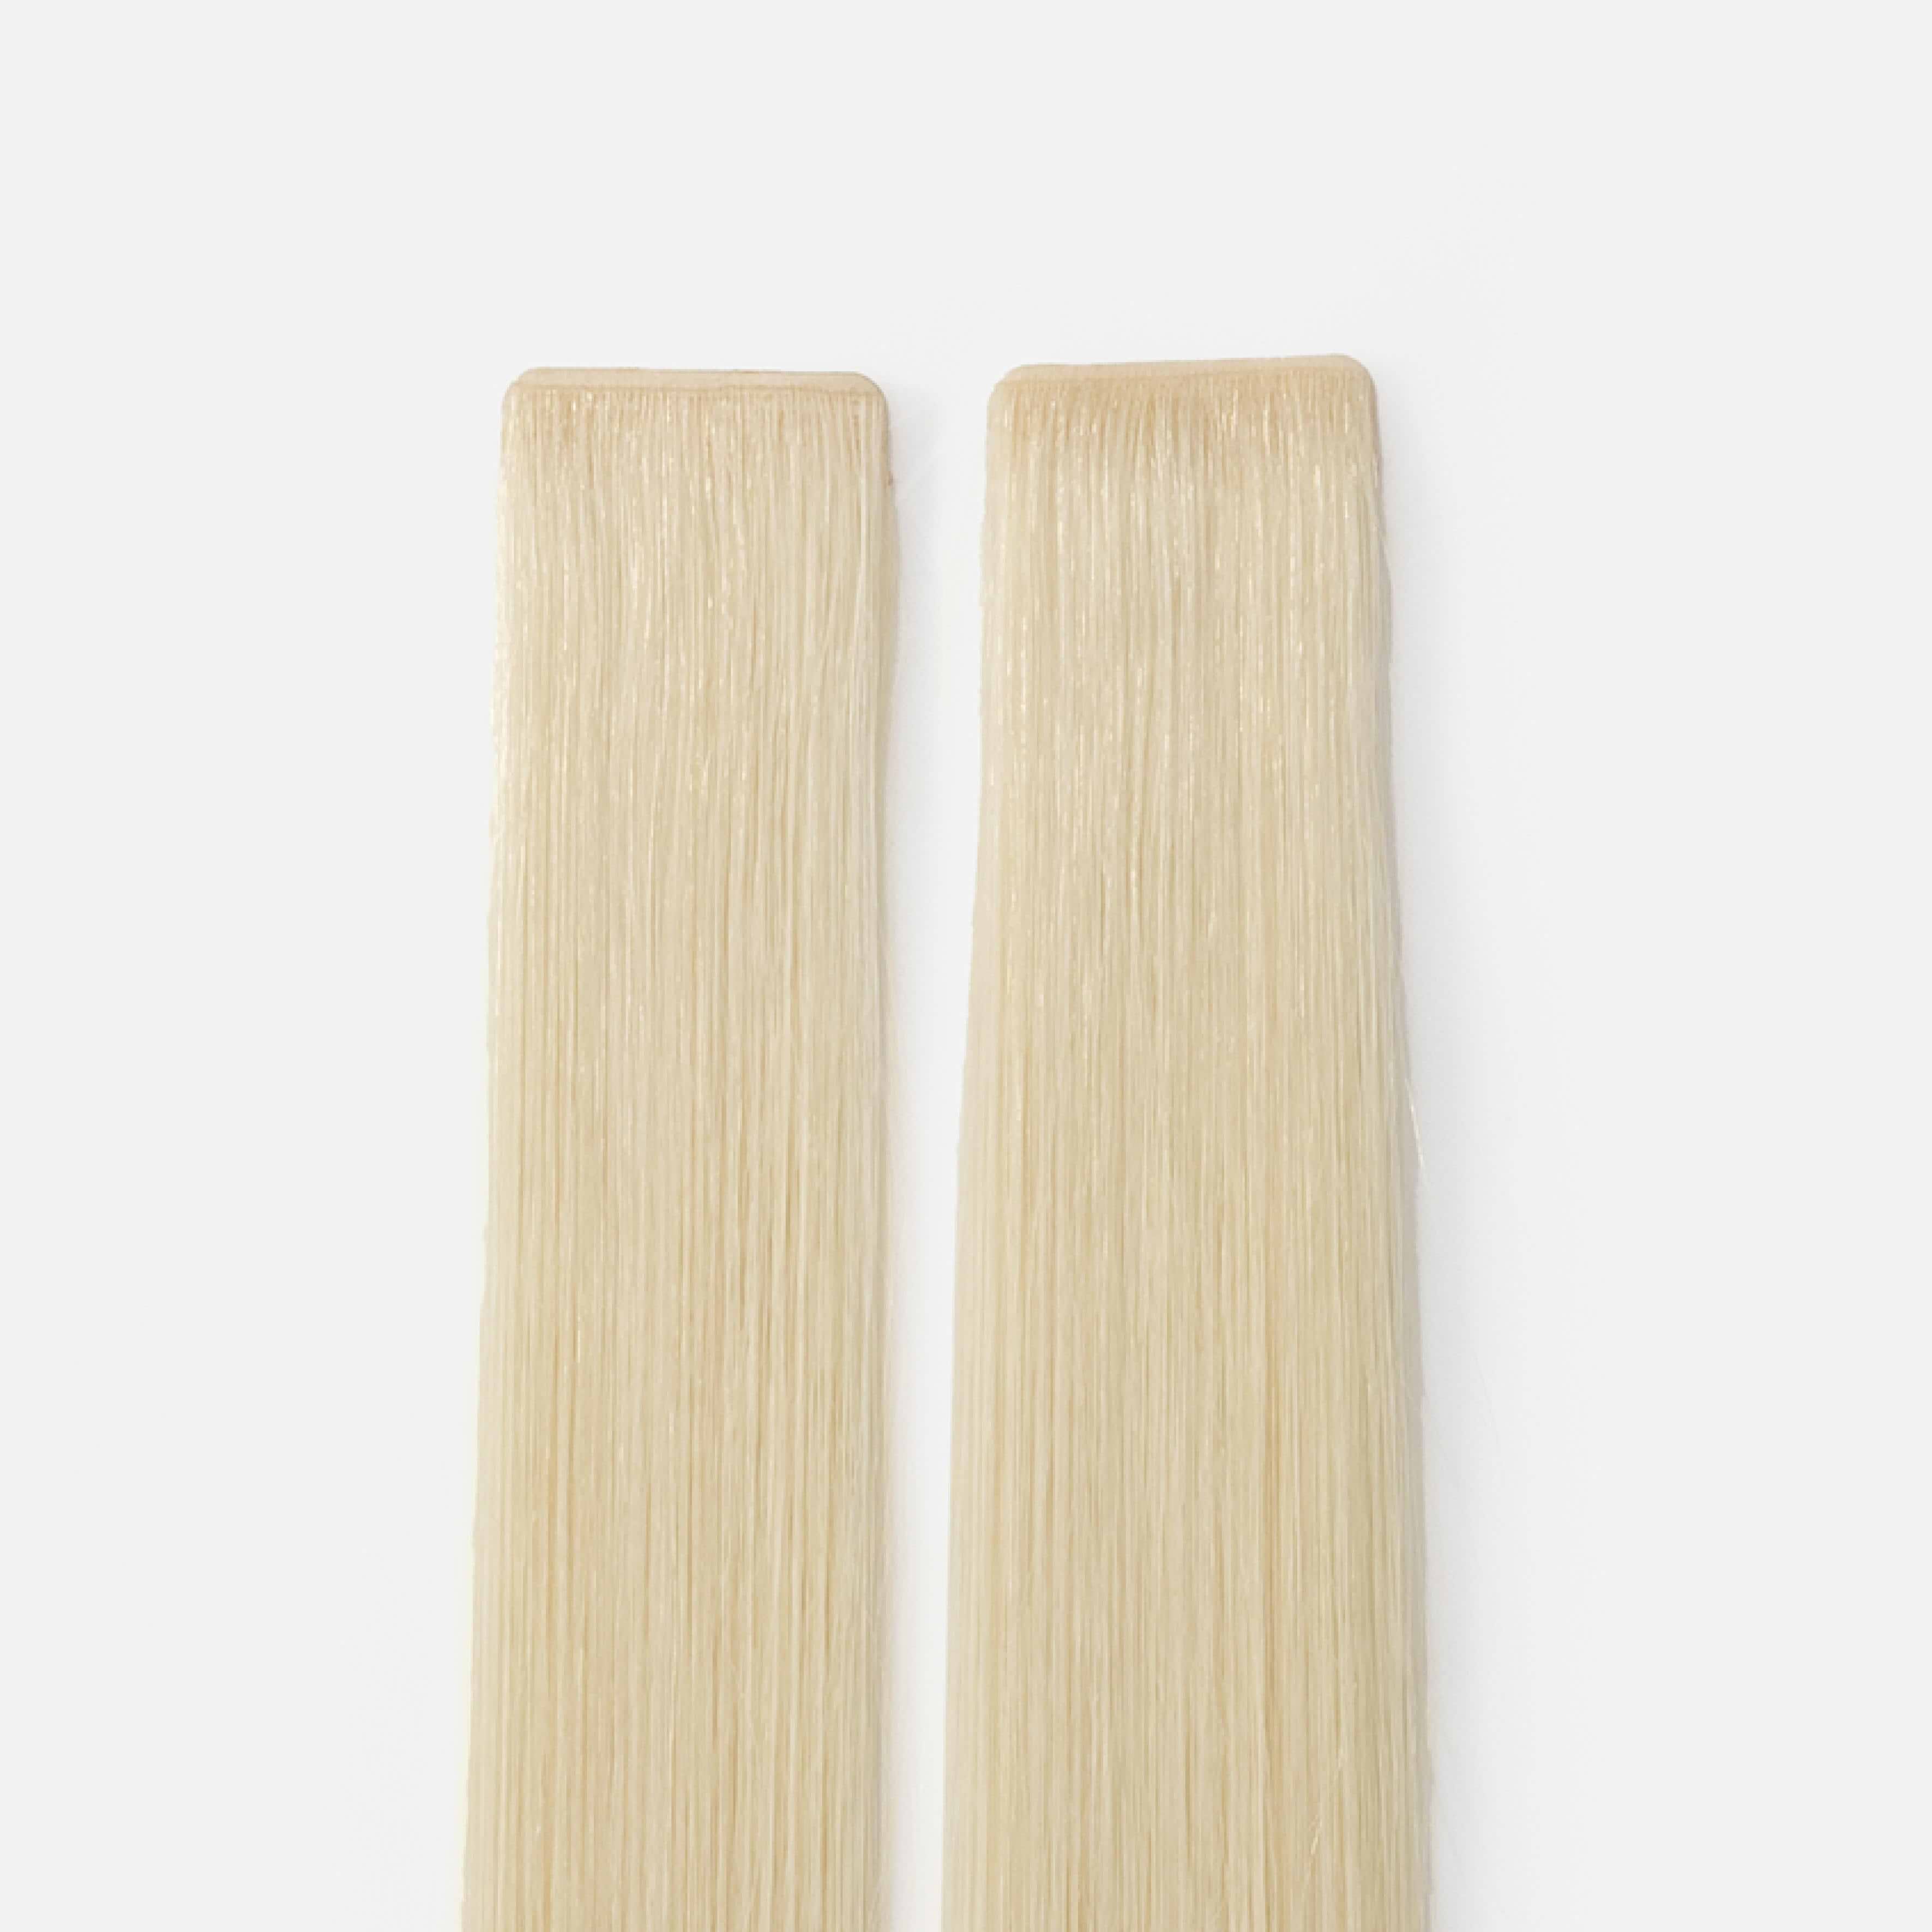
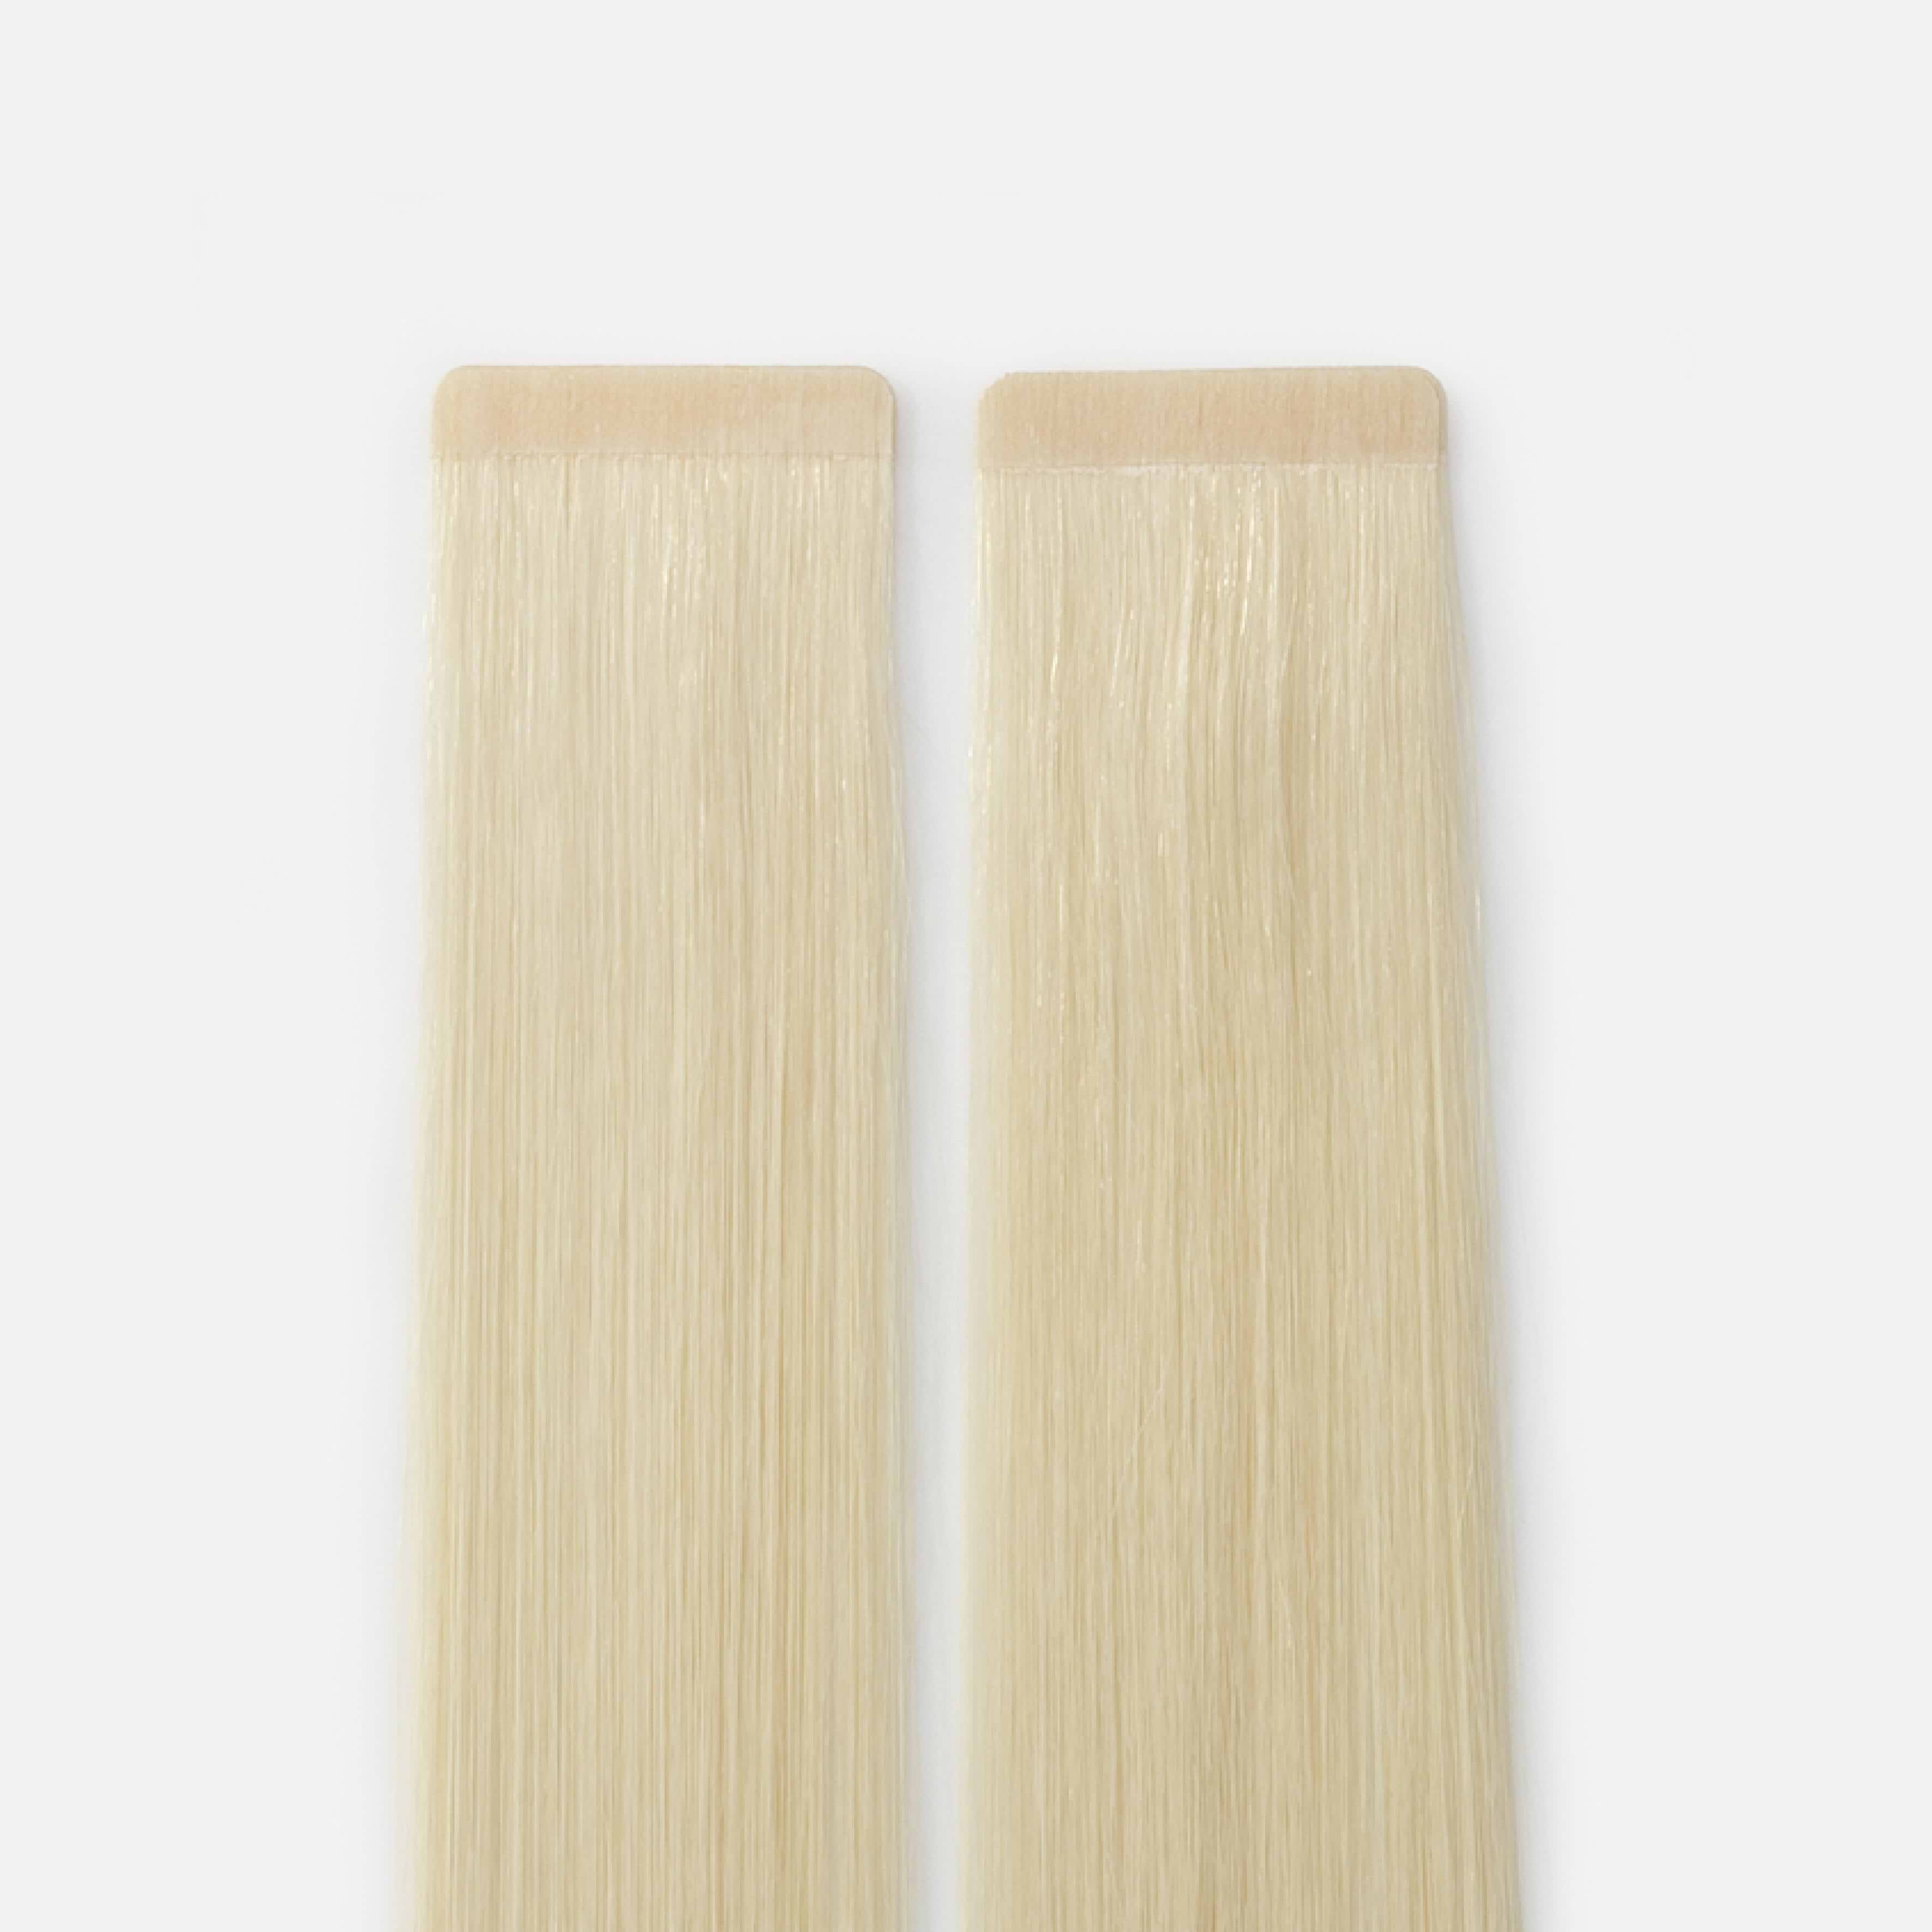
Tape Extensions
Tape-on hair extensions are a quick and easy method that result in a very natural look
– no one will guess you’re wearing extensions! Here is all you need to know!
What are the advantages of tape?
What are the advantages of tape?
They don’t damage your hair
The pieces weigh between 2 and 3 g so they won’t feel heavy or slide off. They work really well if you have fragile and/or damaged hair.
Ideal if you have thin hair
Do you have thin hair in which attachments always remain visible? That’s no longer a problem with Premium Tape Extensions Seamless 4 cm and Premium Tape Extensions Mixed 3 cm.
Natural-looking result
Thanks to the soft, thin tape, you get a discreet attachment. Your magnificent locks will certainly stand out, but it won’t be obvious that you’re wearing extensions...
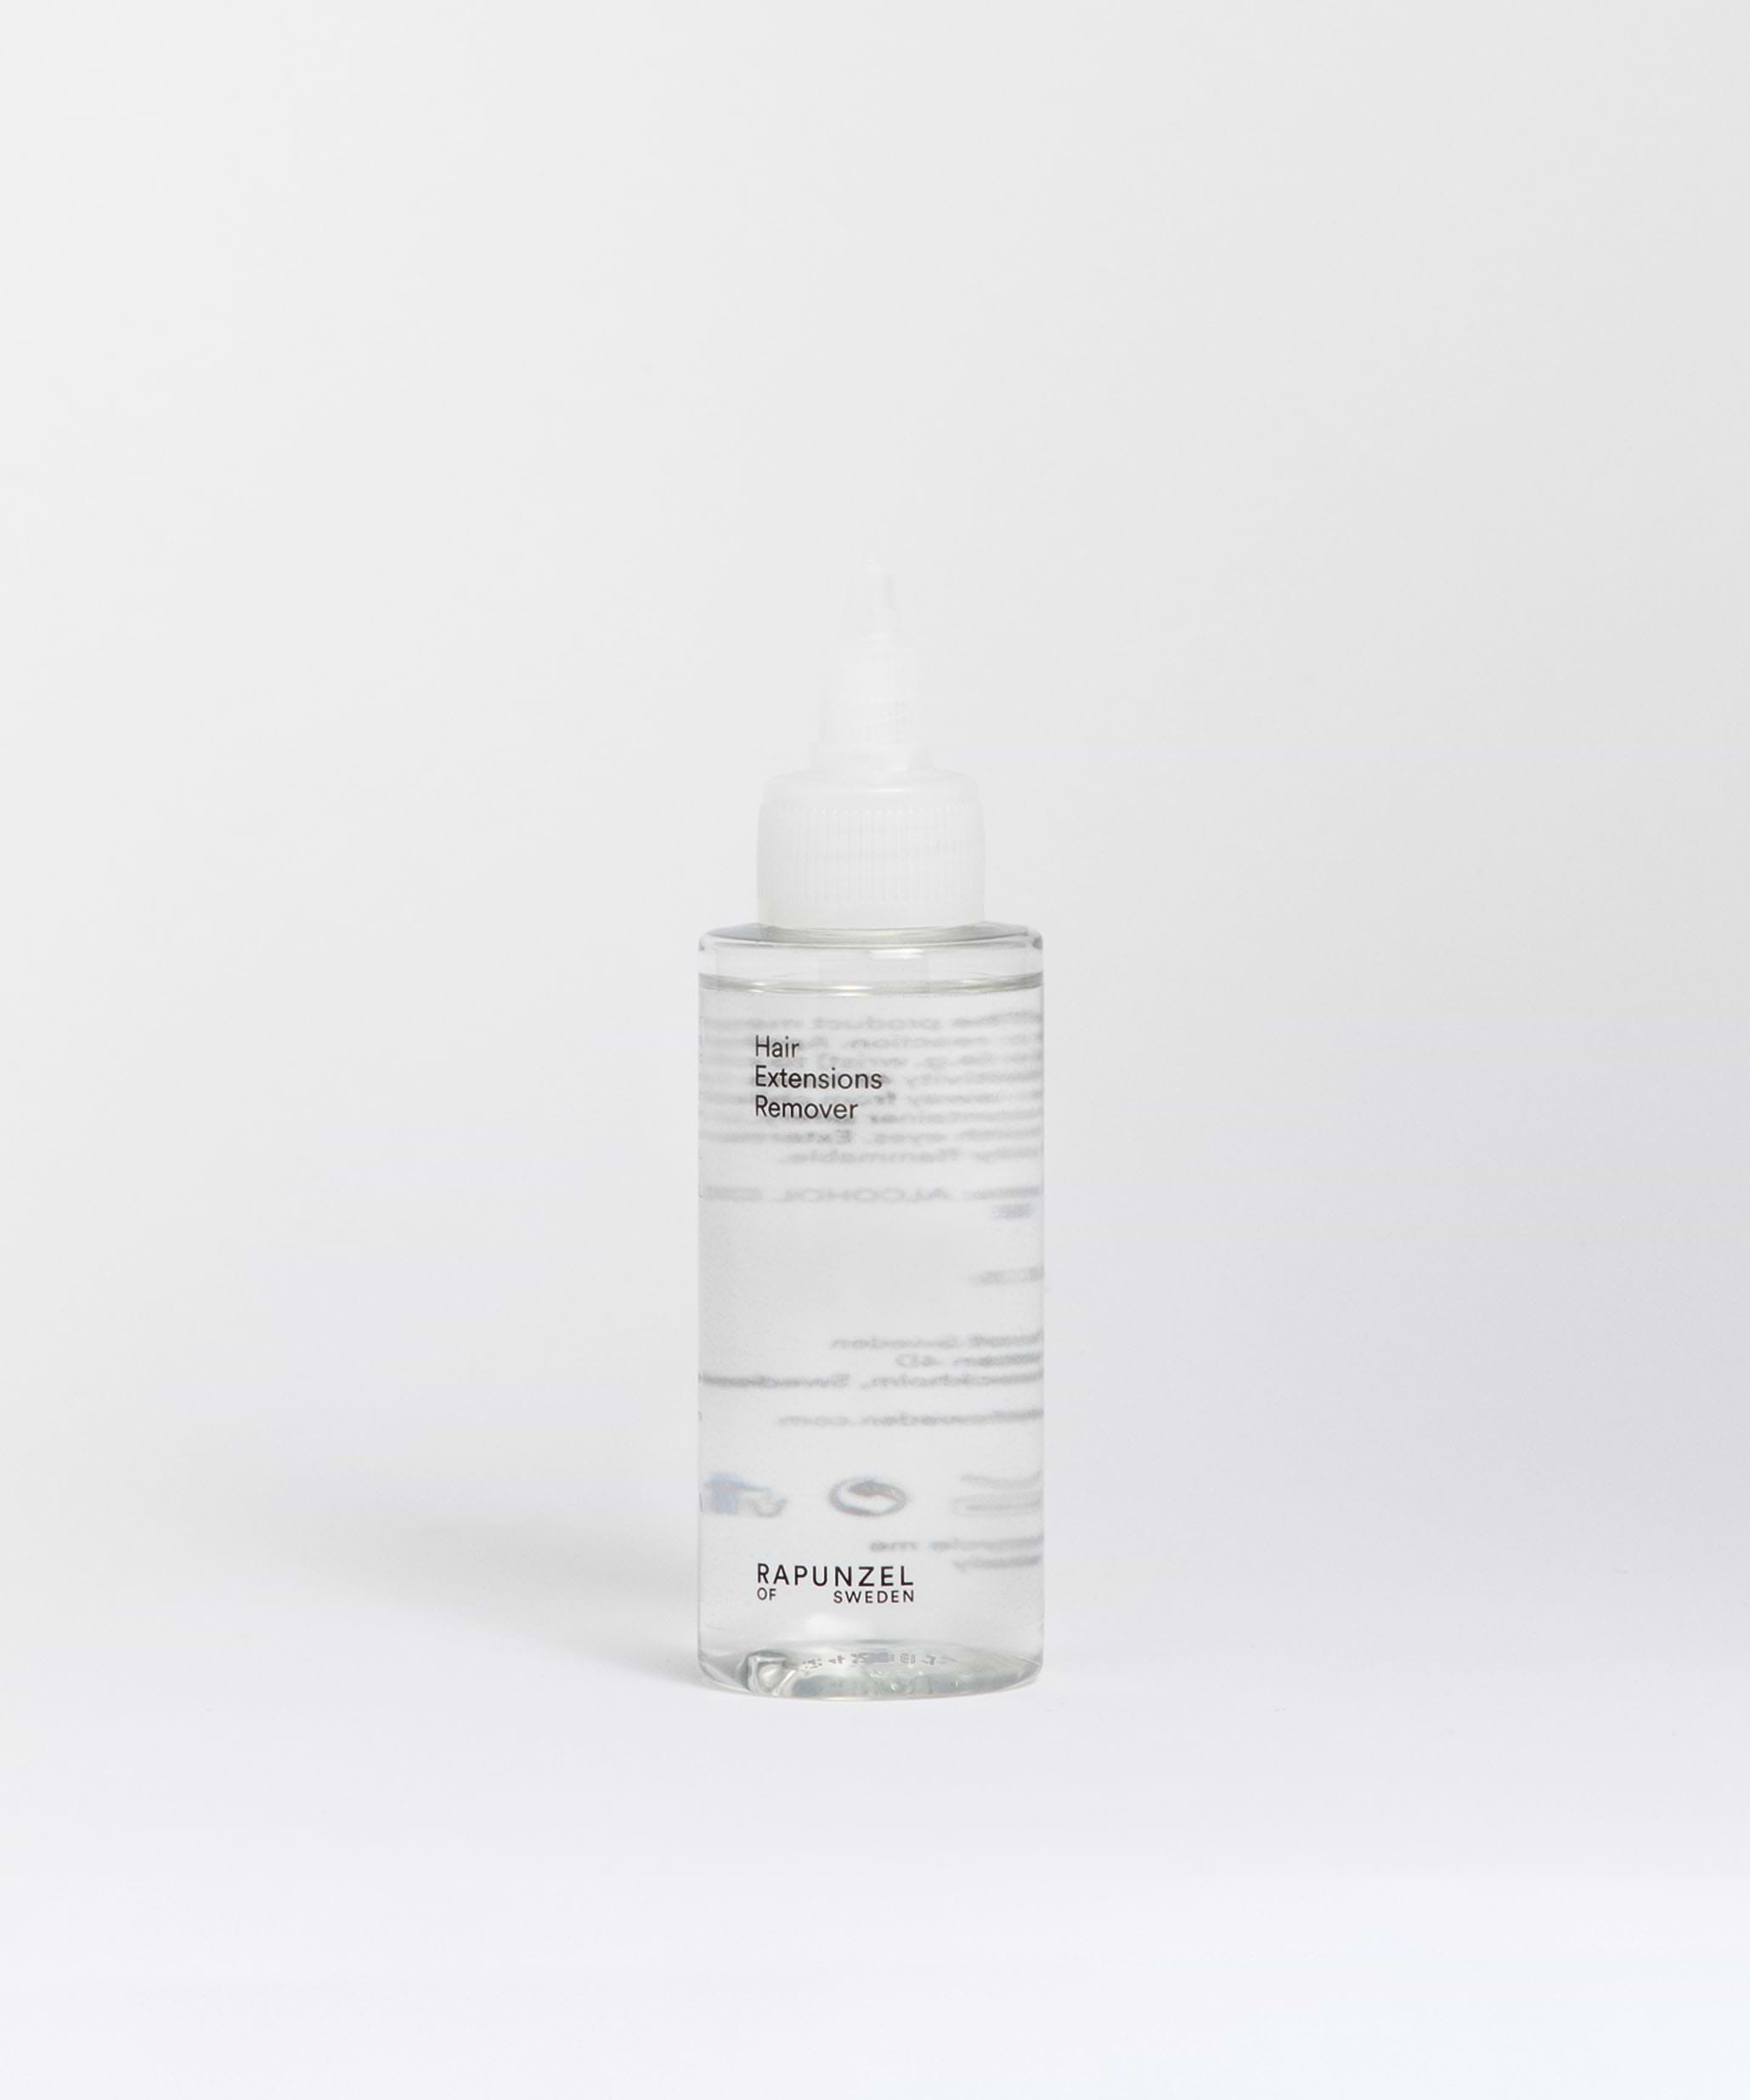
Easy to remove
Thanks to our special remover, it’s easy to remove the extensions when it’s time to move them up.
… and just as easy to reuse
Buy our refill tape so they can be reused. Practical, easy and value for money!
Comfortable
The tape is both soft and very thin. You’ll hardly notice that you have them in.
How many extensions do I need?
The number of tape hair extensions that you need depends on the type of look you want to create and your natural hair type. If you are looking to thicken your natural hair, we usually recommend 1–3 packages. If you want to create an extension of your natural hair, between 4 and 6 packages is the most common. However, if you have very thick hair, or want to create a large wave of hair, you may need up to 8–10 packages.

How to wash your hair
To help your hair and your tape hair extensions to stay nicer longer, it is important to choose a good hair care line, one with lots of moisture and nutrients in the products. Always use brushes made especially for hair extensions. Another tip is to not wash your hair or your hair extensions too often. One way to give your hair a rest is to use a dry shampoo, which can help your hair and your hair extensions stay beautiful for even longer.
How to wash tape hair extensions:
1. Start by separating your hair with your fingers and brush it while it is dry.
2. Rinse with lukewarm water and apply shampoo. Massage the shampoo into the hair extensions using downward movements.
3. Rinse thoroughly and gently squeeze out the water.
4. Use the hair masque 1–3 times per week. After shampooing, apply a generous amount of hair masque to the lengths and ends of the hair (do not use conditioner or hair masque on tape bondings as that could cause them to fall out.) Leave for 3–10 minutes.
5. Rinse with lukewarm water, then gently squeeze out the water, and apply conditioner to the lengths and ends.
6. Rinse thoroughly and gently squeeze out the water with a towel. For best results and less wear, let your hair air dry and then brush through it.

How to take care of your extensions
Wash 1-3 times per week for best durability.
We recommend you use hair care products from Rapunzel of Sweden. The products are specially developed for extensions.
Always use heat protection when styling hair.
Moisturise with hair oil.
How to cut and style tape hair extensions
You can cut tape hair extensions just as you would any other type of hair extensions. Depending on the result you are looking for, you can cut your hair after you’ve added in your hair extensions. Our hair, which consists of genuine strands, can be shaped just like your natural hair can, to fit your look. For best results, it’s a good idea to create balance between your natural hair and the natural hair extensions so that the gaps between the two don’t show. To cut the extensions, you’ll need to angle the scissors and thin out the extension hairs strand by strand starting at the roots. If you’re not sure how to do this, you can always contact us or speak to your stylist.
Rapunzel’s tape hair extensions can be styled just like your natural hair. When you use a curling iron, flat iron, or other hot tools in your hair, you should also use heat protection to shield both your own hair and the extensions from the harsh exposure. When you shape your hair using heat, you should avoid the fastening points in your extensions, which, in this case, is the tape.
Gentle tape hair extensions – do they wear out your hair?
The tape-attachment method is designed to be gentle on your hair. The cleverly designed bondings distribute the weight across multiple strands of hair, preventing the extensions from wearing out your natural hair and slipping out. We recommend that you wear the hair extensions for 6–8 weeks, after which they can be easily reused and reattached using tape refills. It is very easy to remove your tape extensions with a remover and a pin tail comb. The tape dissolves, which allows you to gently remove your hair extensions as easily as you were able to put them in. Next, you remove any tape residue. Then, you can reuse the hair by applying new tape refills to the previously used bondings and attach the hair again just like you did before. So simple and so easy!
You can wear tape extensions while sleeping
Rapunzel’s tape extensions have very thin bondings, which makes them comfortable to wear even while you’re sleeping. Before going to bed, however, it may be a good idea to brush and braid your hair, reducing the wear and tear on your hair as well as the risk of tangles. Plus, your hair will look really nice and curly in the morning! Simply put, a win-win situation.
She’s one of our hair experts responsible for designing and developing our fantastic range of extensions. Now, she’s here to answer some of your most frequently asked questions about our Premium Tape Extensions.
The attachments
Classic features transparent polyurethane (PU) attachments that match your own hair. They are ideal for attaching in places where they are less exposed, for example on the underside of a section of hair or further back on the head.
Who do we recommend tape for?
Who do we recommend tape for?
Our stylists and hair extension experts recommend tape for just about everyone – one of our most popular methods! If you have thin and fragile hair, we always recommend tape because it’s a gentle method with thin and highly discreet attachments.
What are Keratin Extensions extensions?
What are Keratin Extensions extensions?
Keratin Extensions is Rapunzel’s longest lasting hair extension solution. The attachment is applied using a connector tool and the extensions can stay in your hair for up to 3 months. This means you can sleep, train and have a lot of fun with your new hair during these months. The extensions have small attachments, which make it easy for you to put your hair up and create wonderful hairstyles. Keratin Extensions is a method that works well to both lengthen and add volume or to create colour effects. Remember to check the attachments regularly to see if they’ve not grown out too much.

Insertion procedure

Inserting curly Keratin Extensions

Removing Keratin Extensions
After insertion. Please note:
hej
0 Items
0 Items
Styling Keratin Extensions
After inserting your Keratin Extensions, you may need to trim them to create a nice transition to your own hair. Our Keratin Extensions with straight hair can be styled just like your own hair. When using curling tongs, a straightener, hairdryer or other styling tools on your extensions, always use heat protection and do not expose the hair to temperatures higher than 180°C. When styling your hair with heat, you should avoid applying heat close to the attachments. Heat can cause the attachments to melt and loosen.
How many packs of Keratin Extensions do I need?
We recommend using approx. 5–6 packs of Premium Keratin Extensions for a full hair extension, depending on how thick your hair is. If you have naturally thick hair or want to achieve very thick or long hair, you may need 7–10 packs. If you want to add volume to your hair with Premium Keratin Extensions, we recommend 2 packs of 20 pieces and 1 pack of 10 pieces, depending on the desired result.
Washing Keratin Extensions extensions
To keep your hair and hair extensions looking their best for longer, it’s important to provide them with plenty of moisture and nourishment. Apply Rapunzel hair care products to your hair. Use a detangling brush to remove any tangles. And read our care tips for further recommendations.


Use a deep conditioning treatment 1–2 times a week or as required. After shampooing, apply a generous amount of conditioning treatment to the lengths and ends. Avoid using conditioner and deep conditioning treatment close to the attachments as these can cause them to loosen. Leave on for at least 10 minutes, preferably longer. Rinse with lukewarm water, then gently squeeze out the water and apply conditioner to the lengths and ends. Rinse thoroughly, then gently squeeze out the water with a towel.

For best results and less breakage, dry the attachments with a hair dryer at very low heat and the rest of the hair at low heat and low speed. Don’t forget heat protection! Brush through the hair when it’s completely dry.

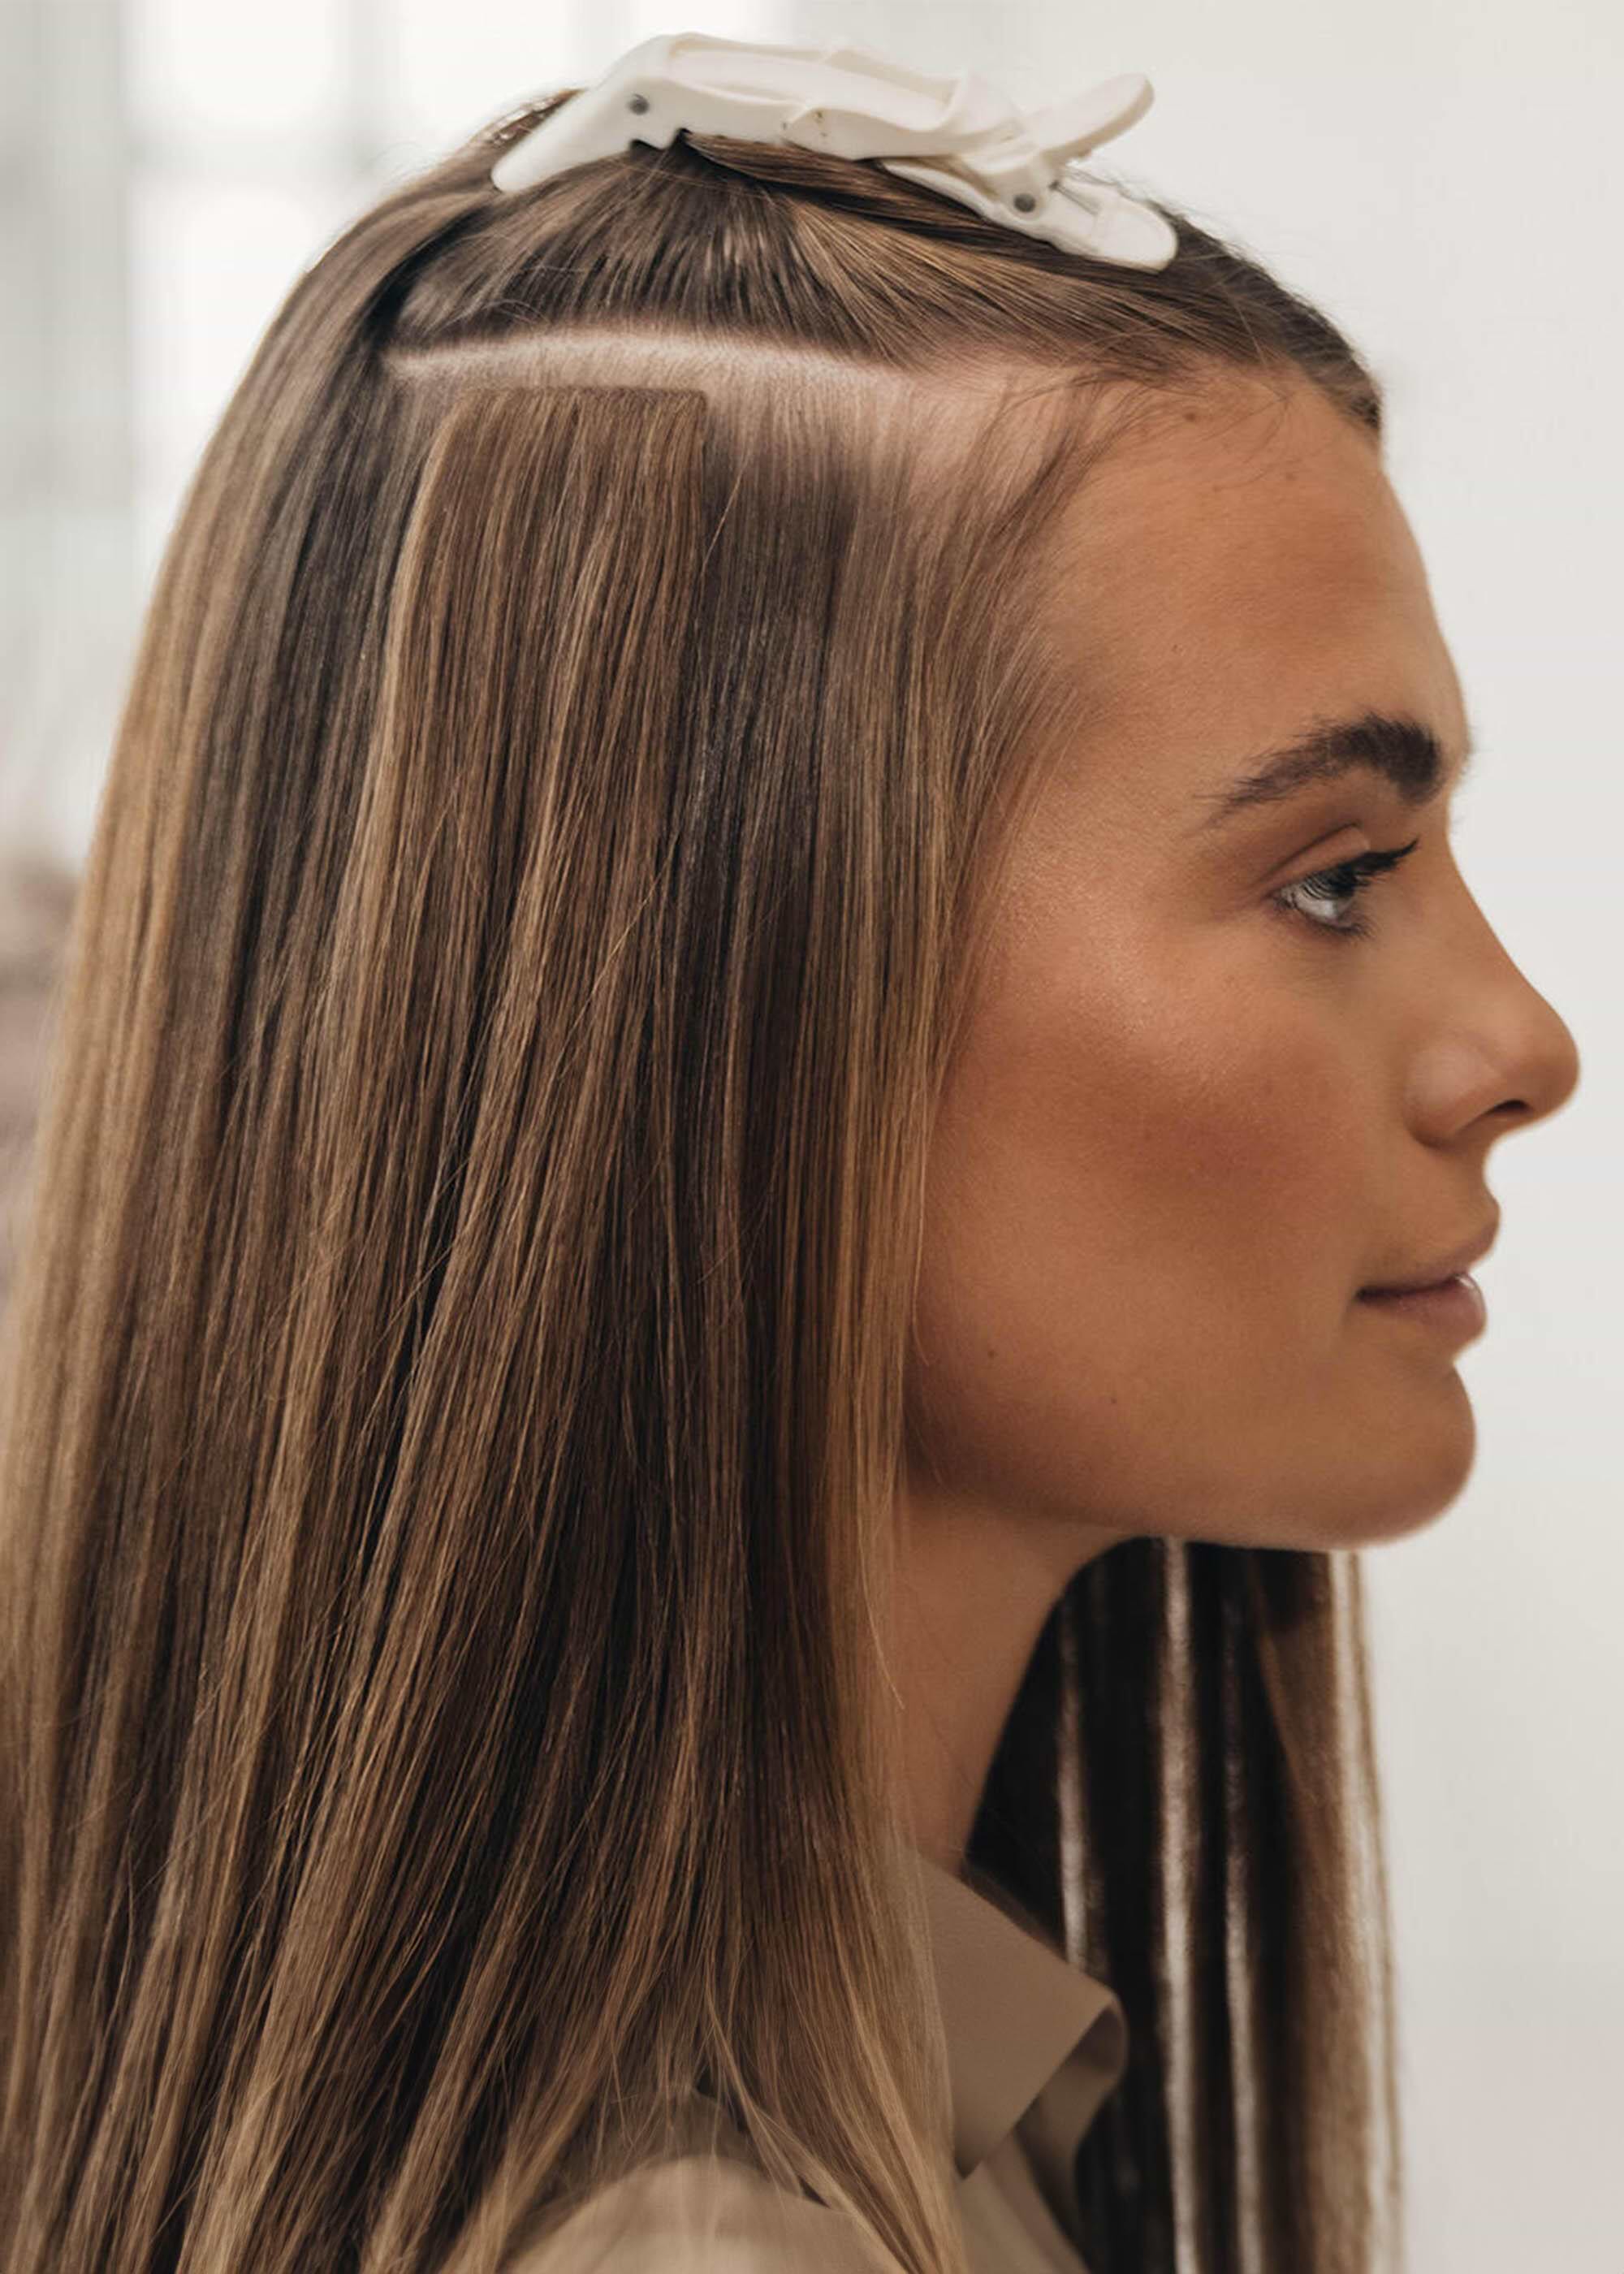
Colour Effects
Colour Effects
If you want to wear extensions for colour effects or to mix colours, it may be a good idea to choose the colour that is most similar to your own hair closest to the hairline and the upper row – in this way your attachments will be invisible and blend in well.
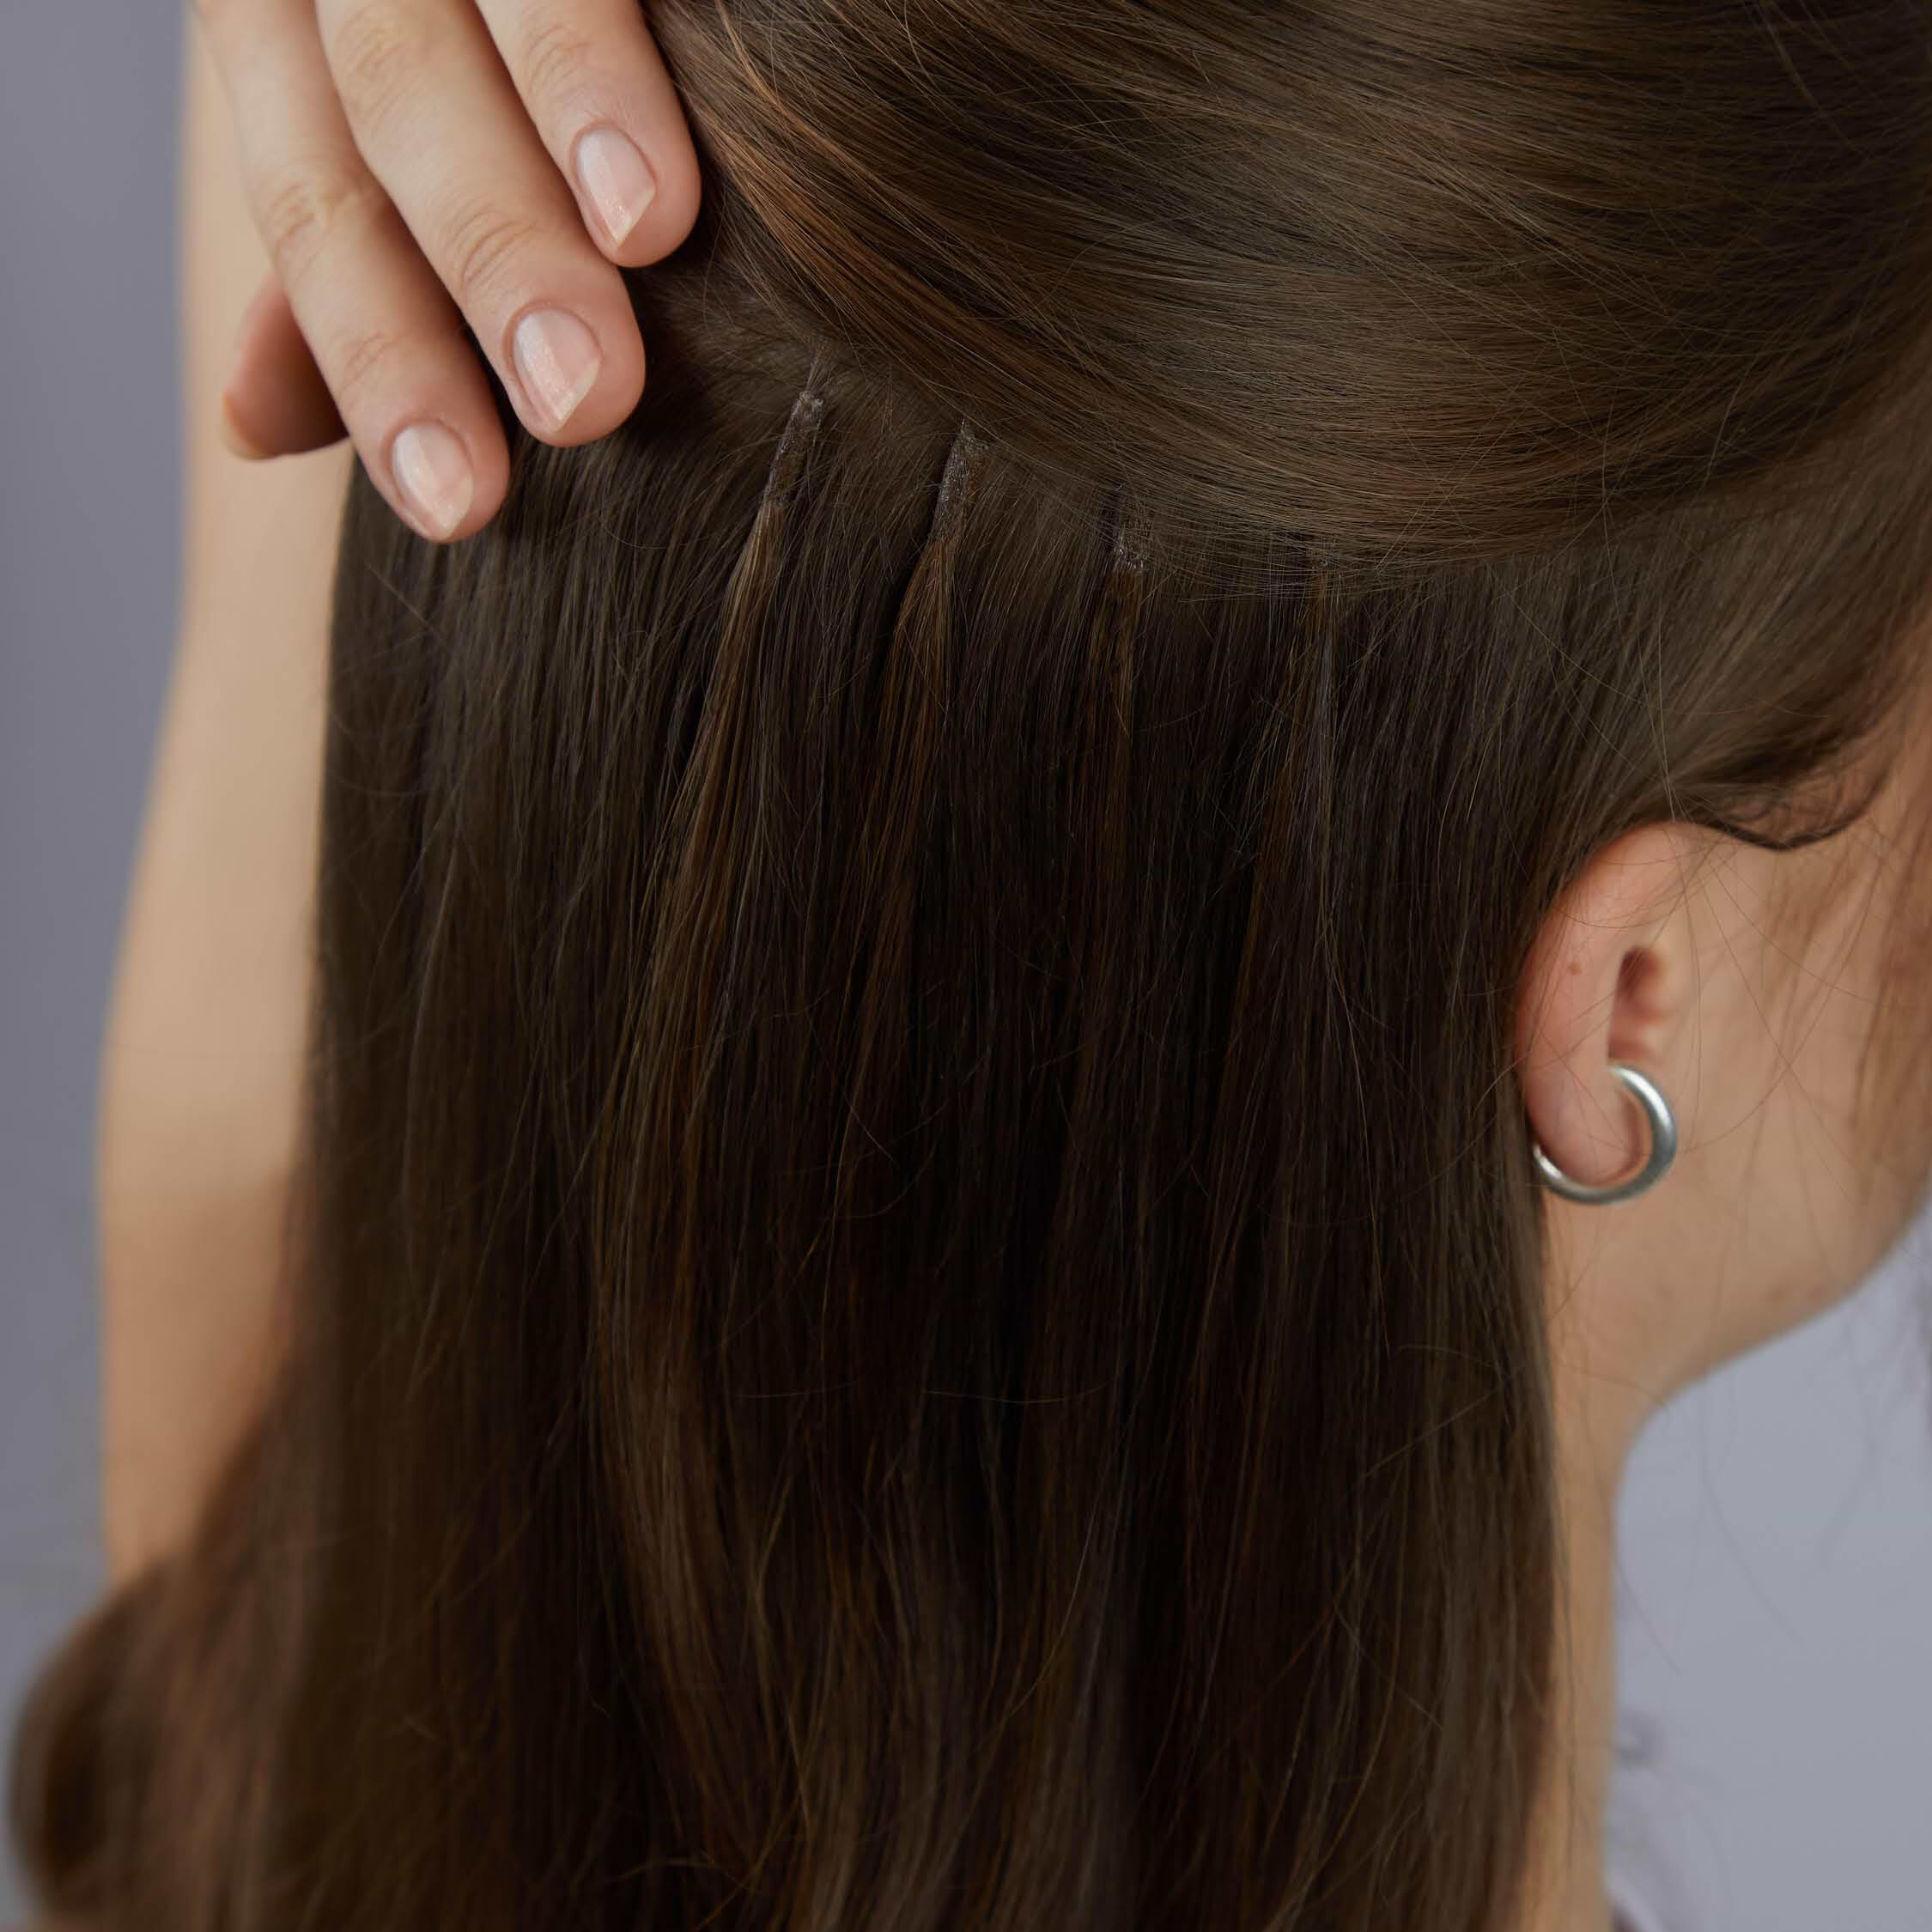
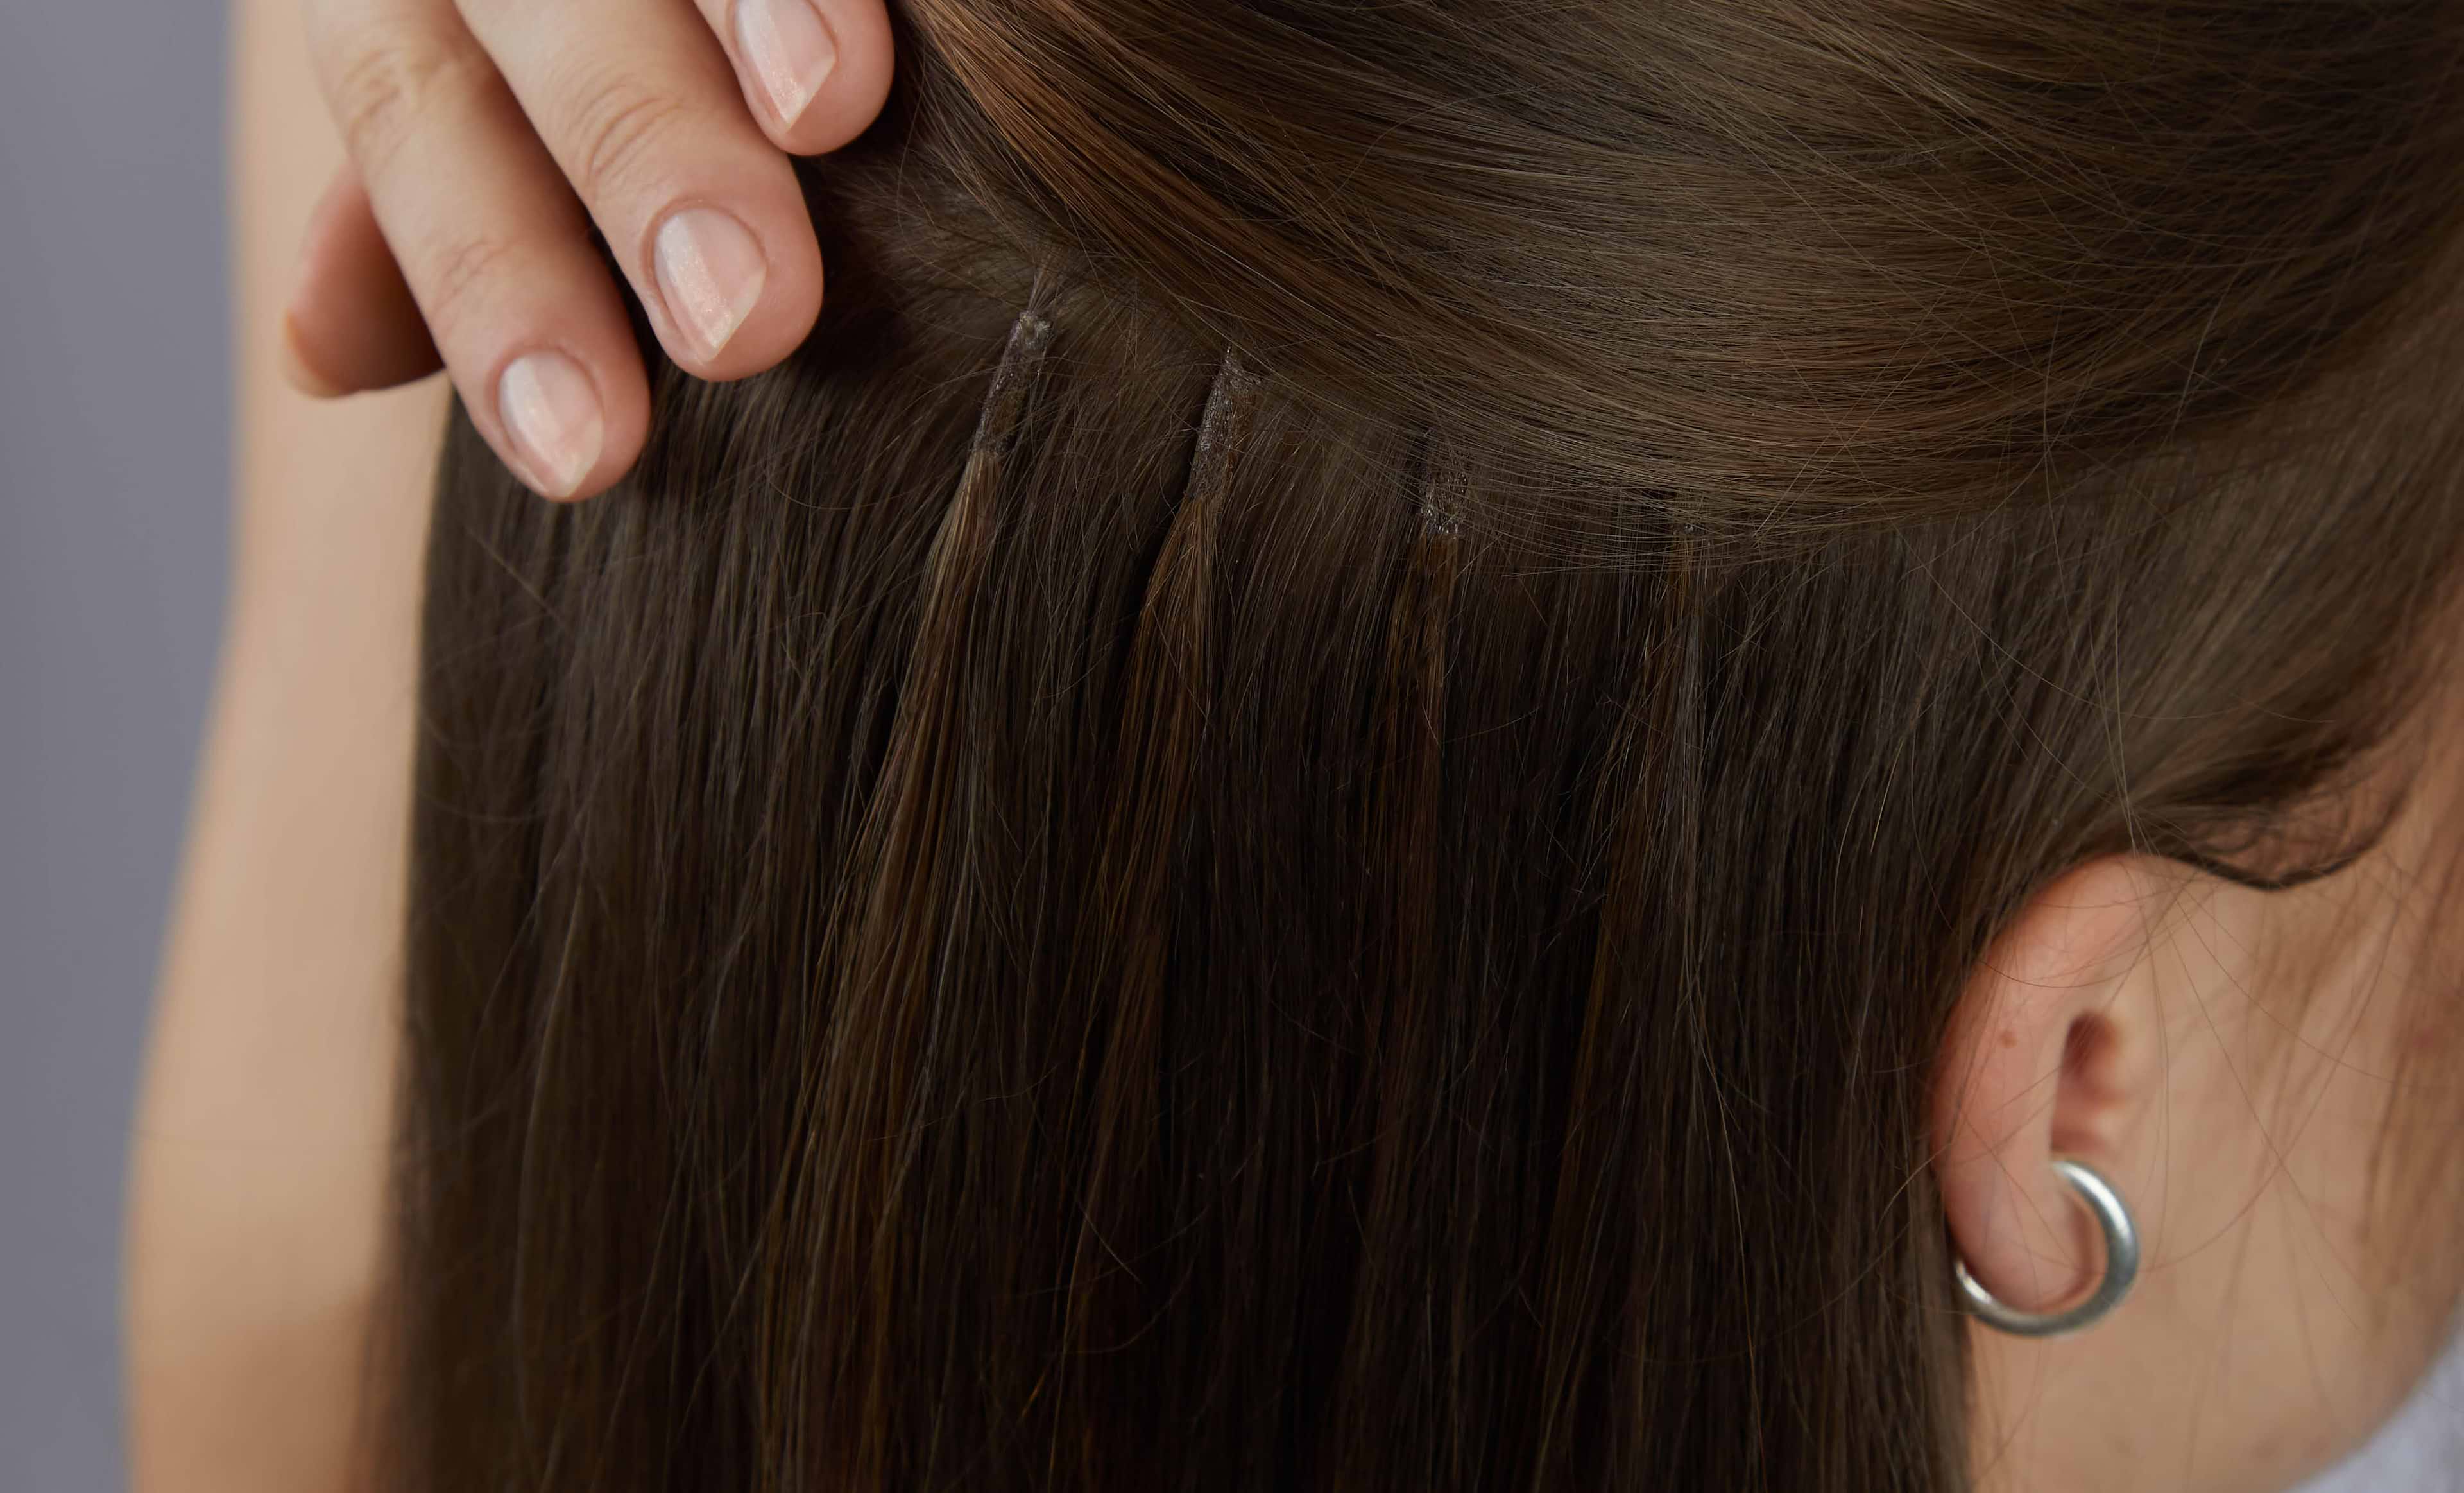
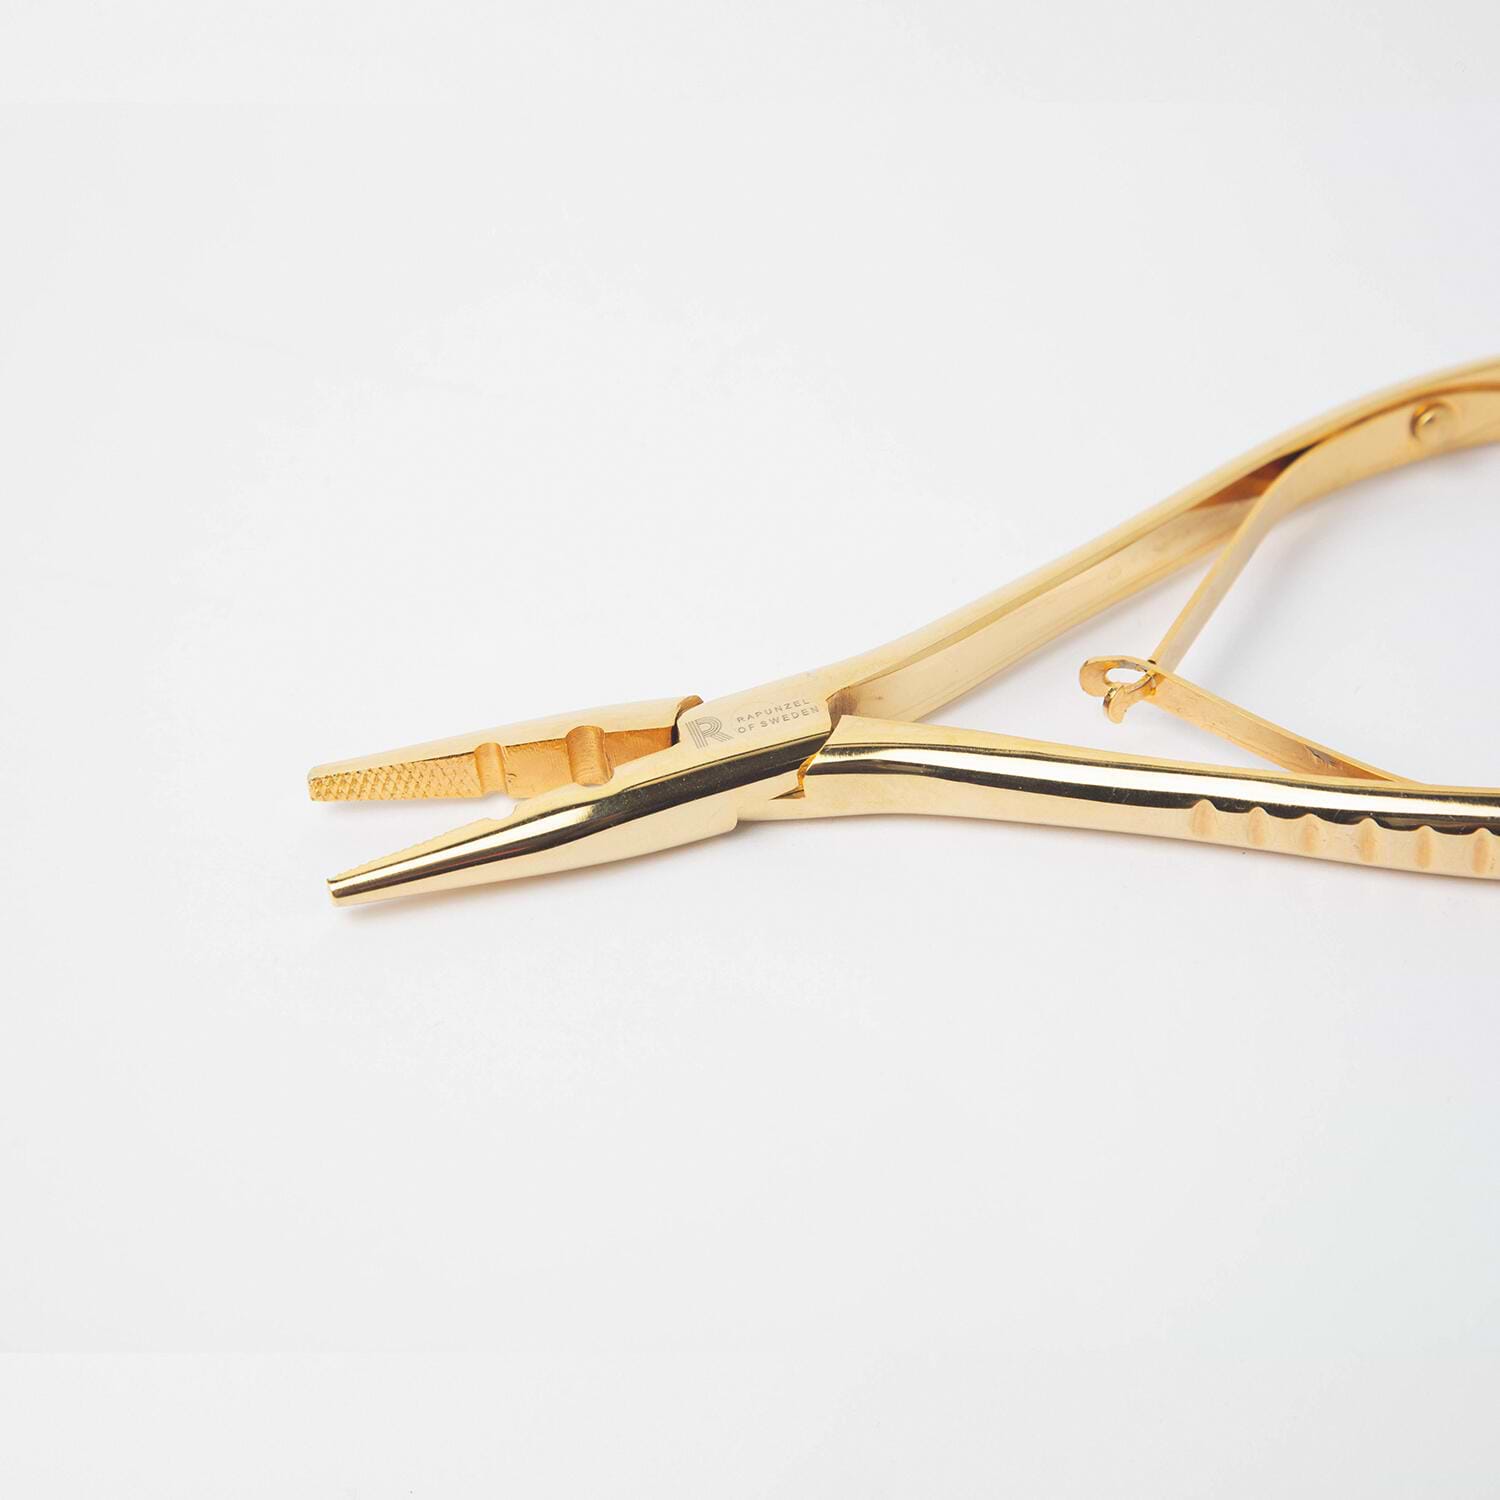
Beaded Weft
Beaded weft is a very gentle method for hair extensions or thickening. You can easily sew the weft with a needle and thread into the nano-rings or micro-rings attached to your own hair. The rings are small silicone-coated metal rings that are attached in place with pliers. The rings and thread are available in several colours to match your hair. The method provides a seamless, natural-looking result.
Inserting using the Beaded Weft method
Before insertion, you should wash your own hair with Rapunzel shampoo and conditioner. Avoid using conditioner close to the scalp and do not use styling products. Ensure that the hair is completely dry before insertion.
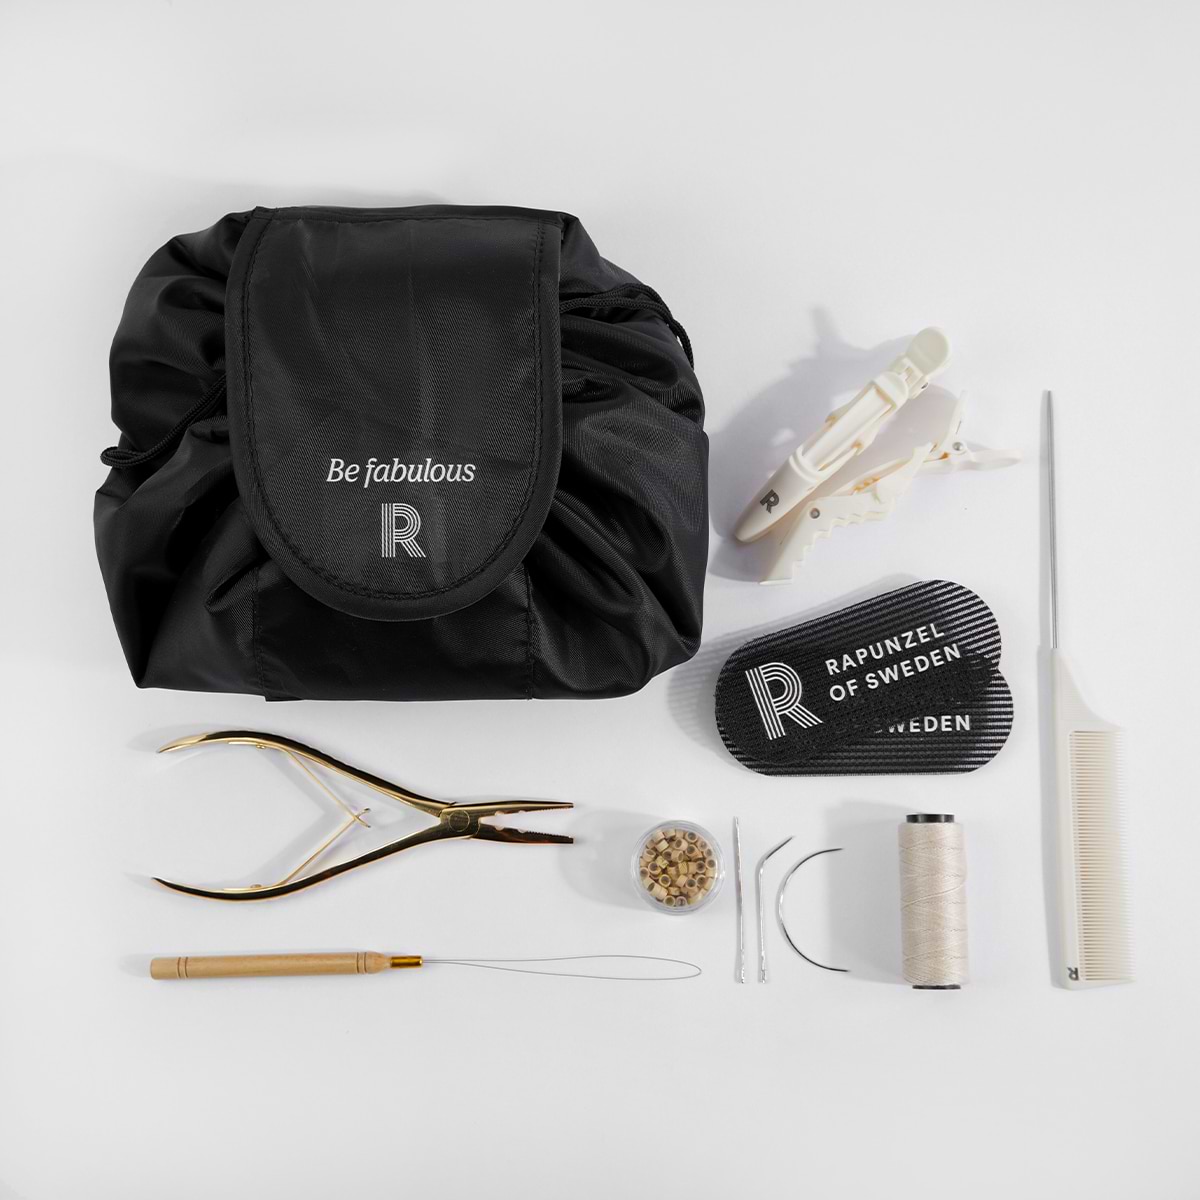
You will need:
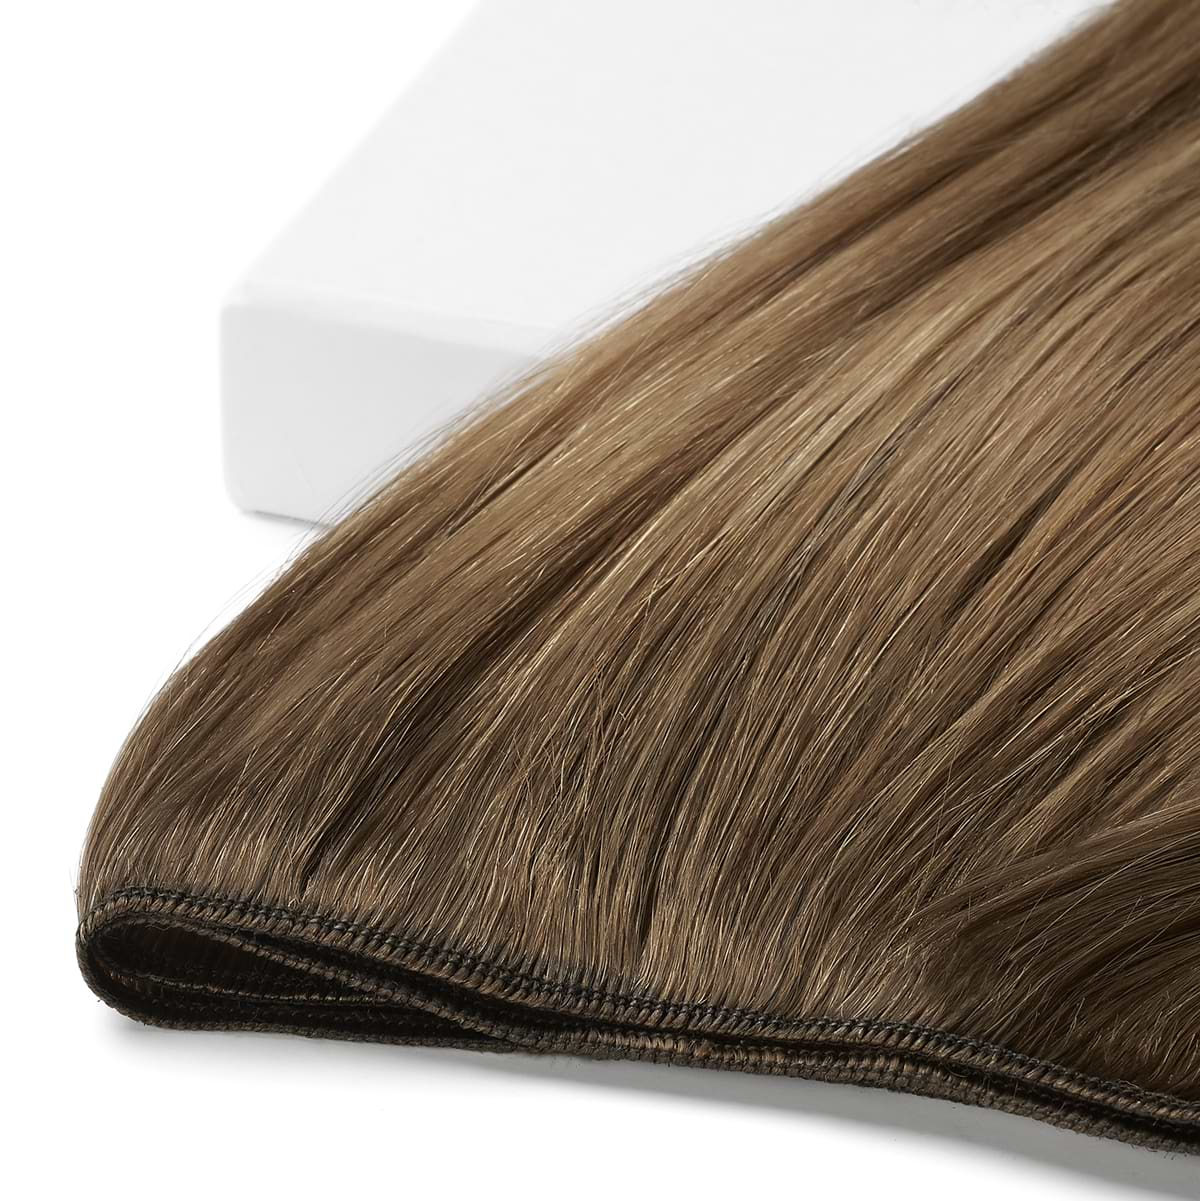
Hair Weft
Hair clips
Loop or hook
Pliers for nano/microring
Nanorings or microrings
Needle and thread
This is how:
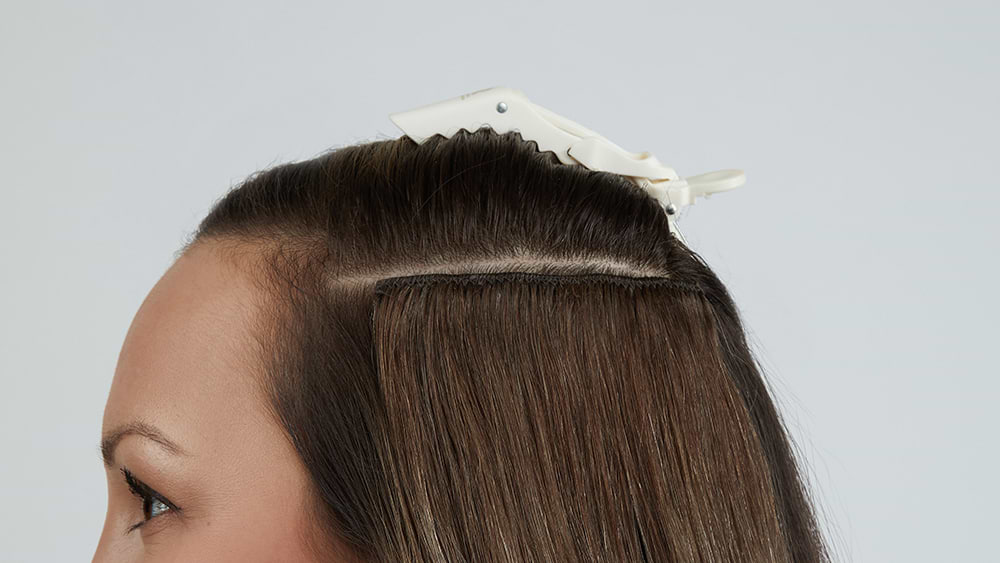
1. Create a horizontal parting. Measure and cut the weft according to the length of the parting. Secure the ends of the weft by resealing the edges so that the hair does not detach from the weft. Do this with a small drop of glue or with a needle and thread.
2. Thread the microrings or nanorings onto a loop or hook.
3. Take a section of your own hair using the loop/hook. You should feel some resistance, otherwise you have taken too little hair on the hook and the hair may slip out.
4. Press the ring together using the pliers. Press quite firmly. The micro-ring should become almost flat.
5. Continue to attach the rings along the parting. The gaps between the rings should be about the same as the width of the hair sections you pass through the rings.
6. Use hair clips to attach the weft along the parting.
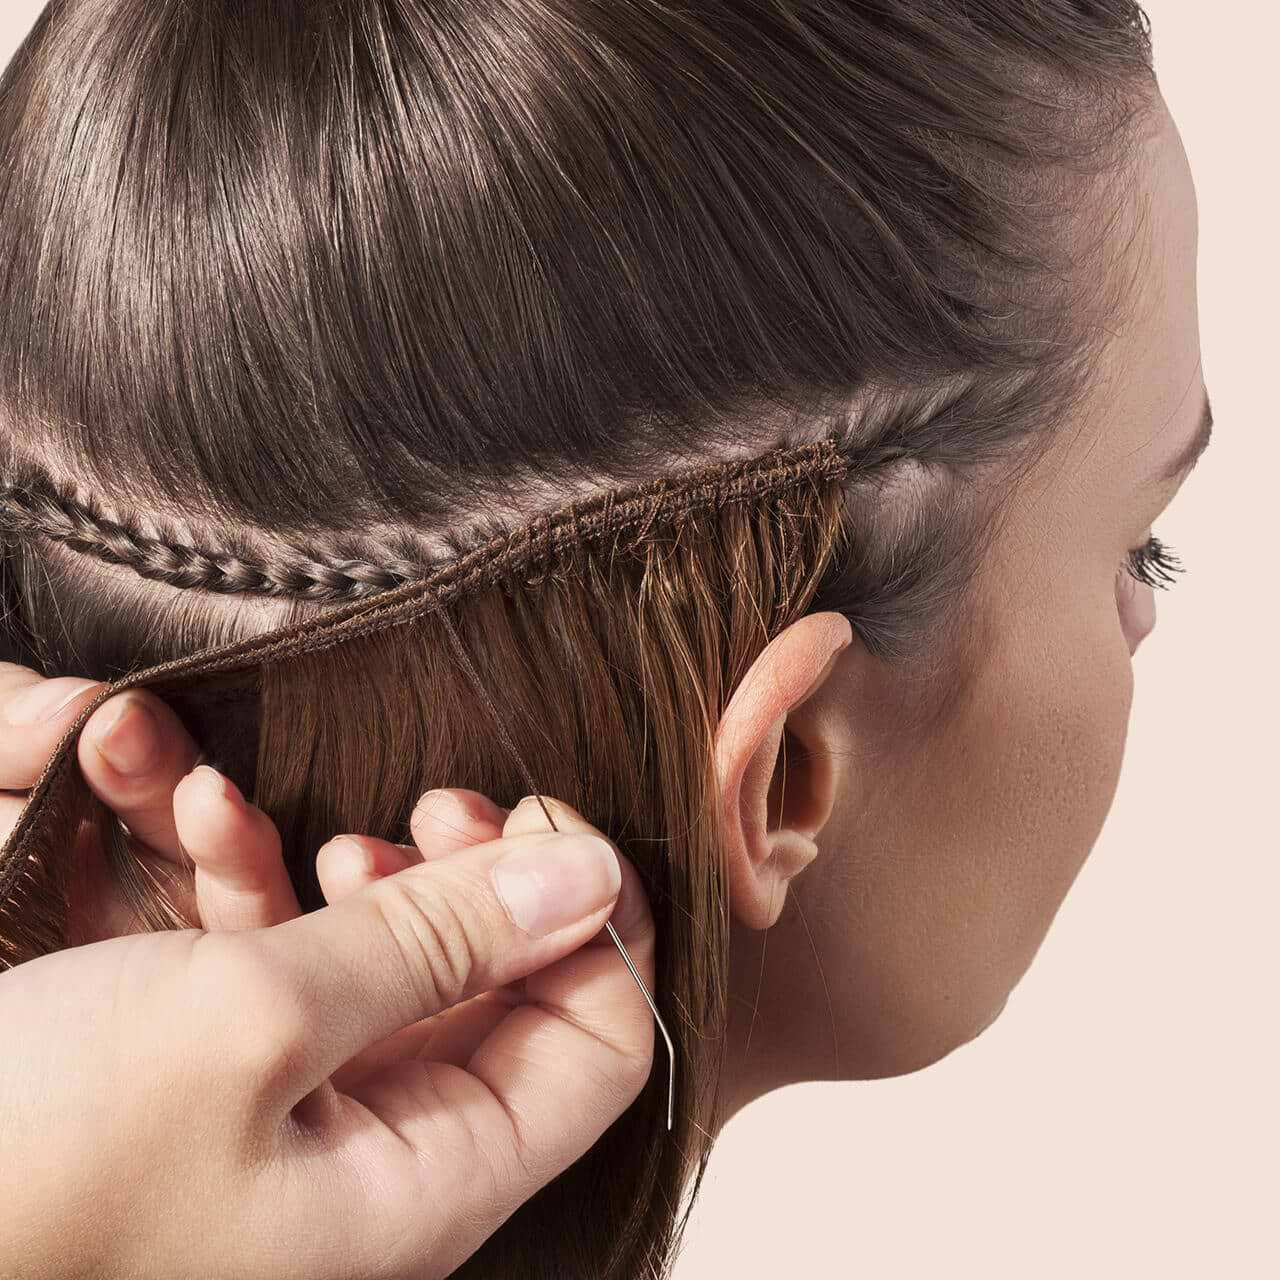
7. Sew the weft with needle and thread to each ring. Thread the needle through the weft and then through the hair between the ring and the hairline. Sew a chain stitch and move on to the next ring.
8. Release your own hair and brush gently. And you’re done!
Reinserting the Beaded Weft
As your own hair grows, so does the weft. Therefore, you need to move the weft up approx. 4–6 weeks after insertion. This is easy and only takes a few minutes. Make sure that the hair is completely dry when reinserting, to minimise damage to your own hair.
You will need:
Hair clips
Pliers for nano/microring
This is how:
1. Lift up your own hair covering the weft and secure with a clip.
2. Lift up the weft in the same way and secure with a clip.
3. Loosen the strands of your own hair where the micro/nano-rings are attached and let them hang loosely.
4. Hold the micro-ring with the pliers.
5. Open the attachment by grasping the micro-ring at the ends. The ring then takes on an oval/round shape again.
6. Use the tongs to move the ring higher up the section of hair, closer to the scalp, and then press the ring together again.
7. Repeat for all the rings.
8. Release the weft and your own hair again.
9. Gently brush your hair. And you’re done!
Removing your Beaded Weft
Removing your Beaded Weft is easy. Make sure that the hair is completely dry and follow the steps below.
You will need:
Hair clips
Scissors
Pliers for nano/microring
This is how:
1. Lift up your own hair covering the weft and secure with a clip.
2. Carefully cut the sewing thread and pull it off. Repeat for all the micro/nano-rings.
3. Remove the weft from the hair.
4. Hold the micro-ring with the pliers.
5. Open the attachment by grasping the micro-ring at the ends. The ring then takes on an oval/round shape again.
6. Carefully pull out the micro-ring.
7. Repeat for all rings.
8. Release your own hair. And you’re done!
Weaving
If you’re going to sew on your hair using the weaving method, you can do so in several ways. If you’re unsure, you can always ask your hairdresser for help and advice for your hair type. Wash your hair with Rapunzel shampoo before insertion, but avoid conditioner and styling products. Allow the hair to dry. It should be completely dry before insertion.
Sewing on your weft
This is how
1. Part your hair and take a section of it.
2. Use this section to braid a tight, French braid.
3. Start on one side and braid to the middle. Secure the braid with a small transparent rubber band and then braid the hair from the other side.
4. Measure out and cut the weft so that it fits the length of the whole parting you created. Secure the ends of the weft using a needle and thread to prevent the hair from coming out of the weft.
5. Then with a threaded bent needle, gently sew the weft onto the entire braid.
6. Securely attach the ends of the weft.
7. Repeat for the other pieces until you achieve the desired result.
Styling tip!
As your hair is braided tight to the scalp and then covered with extensions, it takes longer to dry. After washing your hair, you should pay special attention to make sure that it’s actually dry
– a good idea is to section the hair when drying it. This makes it easier to get to the concealed attachments.
Removing your weave extensions
Removing a weave extension is easy. Use smaller scissors.
This is how
1. Carefully cut the threads that hold the weft in place.
2. Repeat the procedure, parting by parting.
3. Then loosen the rubber bands that hold the braided hair together and brush through it.
Microrings
Yon can use microrings to attach your weft. You attach your weft to your own hair using small silicone-coated metal rings that you fasten in place with the help of pliers. The microrings are available in several colours to match your hair extensions. Before inserting the hair, you should wash your hair with Rapunzel shampoo. Avoid conditioner and styling products, and allow the hair to dry thoroughly before insertion.

Attaching your weft with microrings
This is how
1. Create a horizontal parting. Measure and cut the weft according to the length of the parting. Secure the ends of the weft by resealing the edges with adhesive or needle and thread, so that the hair does not detach from the weft.
2. Use hairgrips to secure the extension of your desired length to your own hair.
3. Put a microring onto the needle, then open the hook.
4. Take some of your own hair and some hair from the weft using the hook. Then pull the hair through the microring. (You should feel some resistance, otherwise you have taken too little hair on the hook and the hair may slip out.)
5. Press the microring together using the pliers. Press quite firmly. The microring should become almost flat.
Removing your weft
When removing the weft, use the same pliers as for insertion. The hair should be completely dry. To minimise damage to your own hair, you should never pull on the hair. Follow our instructions to make the process as smooth and easy as possible. It’s a good idea to section your hair in the same way as when you put in the weft.
This is how
1. Hold the microring with the pliers.
2. Open the attachment by grasping the microring at the ends. The ring then takes on an oval/round shape again.
3. Carefully pull out the microring.
4. Repeat for all the sections individually until you have removed all the pieces. And you’re done!

Washing Hair Weft
Washing Hair Weft
Wash your hair with Rapunzel’s hair care products that have been specially developed for extensions.
1. Brush or comb through the hair before washing. Using a soft hairbrush, start by brushing the ends and work your way up in sections. Use a soft brush if your hair is straight and a wide toothed comb if your hair is curly.
2. Rinse the hair with lukewarm water and then apply shampoo from root to tip. Avoiding rubbing. Rinse thoroughly and shampoo again.
3. Towel dry the hair and then apply a deep conditioning treatment to the lengths. Leave in for at least 10 minutes.
4. Apply conditioner to the lengths, avoiding the attachments and scalp. Rinse thoroughly.
5. Let the hair dry naturally or use heat protection and blow-dry on low heat.
Styling your weft
Styling your weft
It may be necessary to trim and style the weft so that the transition between your own hair and the extensions looks as natural as possible. If you are use styling tools, always put on heat protection. Do not expose your hair to temperatures higher than 180°C.
Note: curly and wavy hair extensions should never be styled with a heated styling tool such as a straightener or similar.
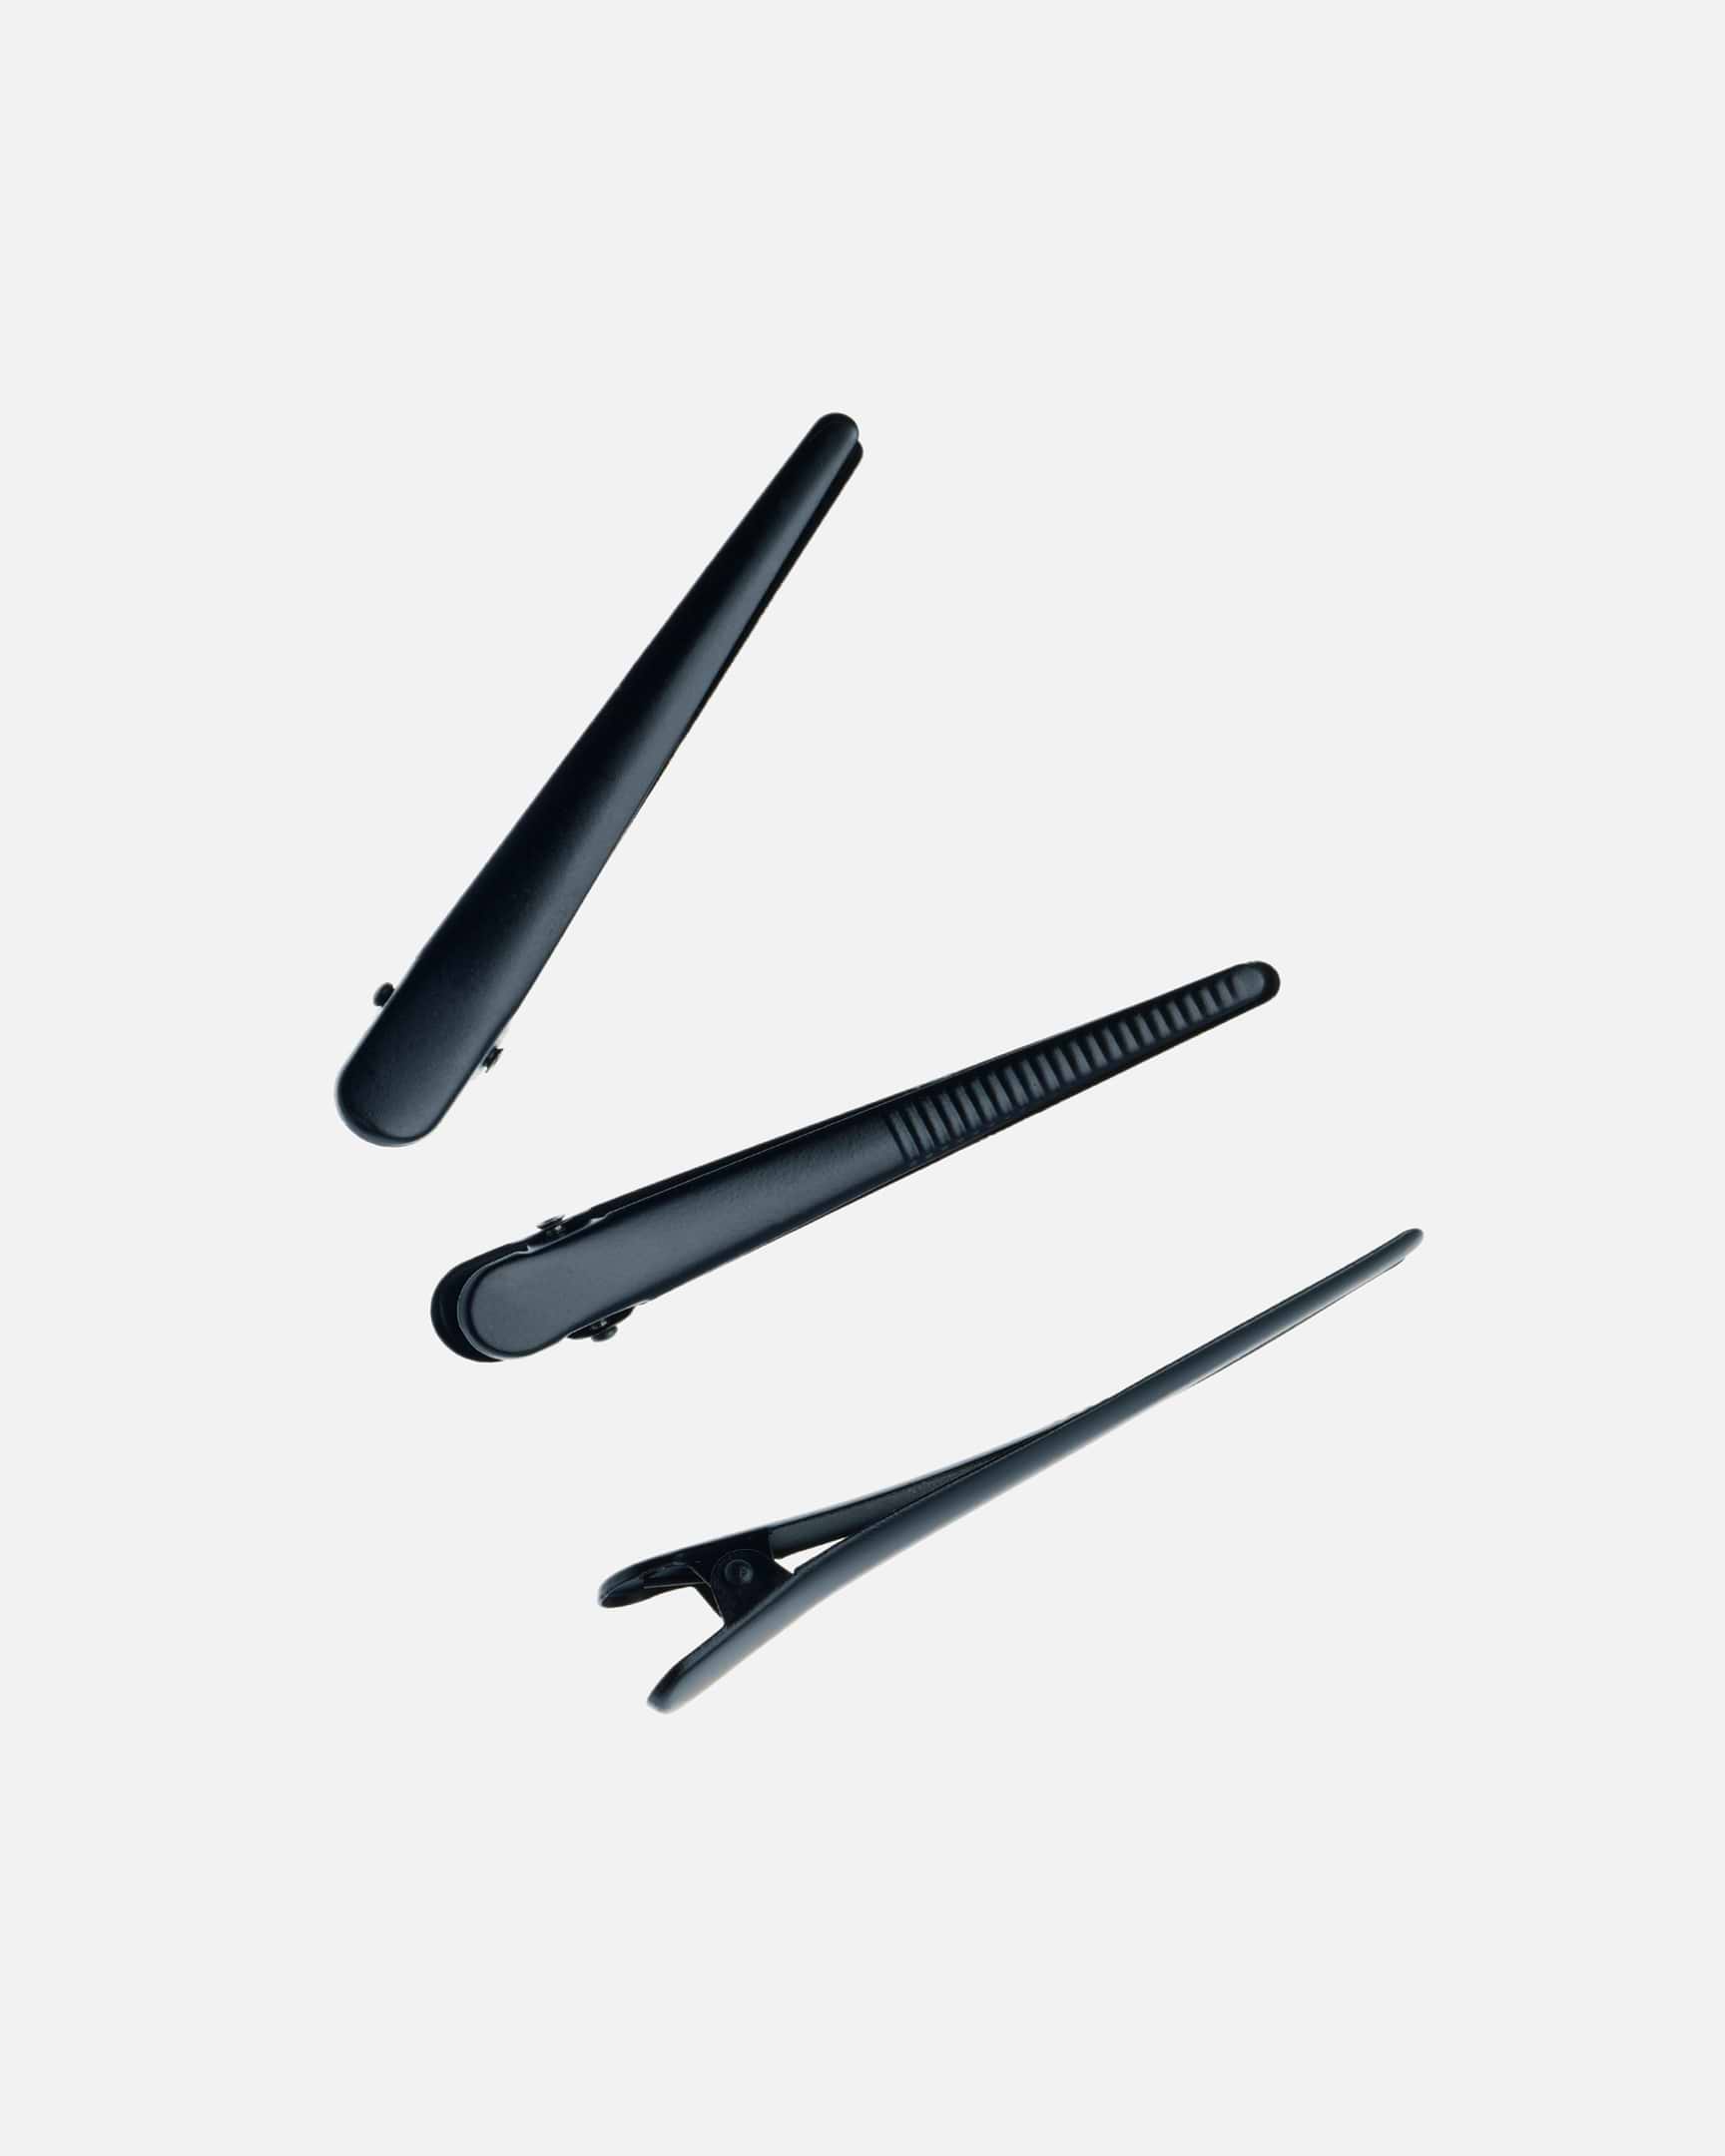
DIY Clip-on set
Do you want to decide on the length of your Clip-on hair yourself? With a weft, it’s possible.
Make your own Clip-on set
This is how
1. Create a horizontal parting where you want the extensions to sit. Measure and cut the weft according to the length of the parting. Secure the ends of the weft by resealing the edges with adhesive or needle and thread, so that the hair does not detach from the weft.
2. Sew the clips onto the weft. Depending on the length of the weft, you will need 1-4 clips per weft. Use enough clips to distribute the weight of the weft as evenly as possible on your own hair.
3. Follow our clip-on guide on how to attach and care for your hair. A clip-on set is a temporary hair extension or thickening, which is used occasionally and should be removed before sleeping, training, or showering.